Truly, I never imagined having the IP camera up in the treehouse would be nearly this much fun. But it is, and I'm not ashamed to admit I have the feed up and on the iPad almost all the time during the day.
Which is why, this morning, I discovered that all the evidence points toward "Fuzzball" (as my daughter named the little squatter) being female. Because today there were two other squirrels, presumably males, running around and generally being entertaining while trying to curry her favor. What makes one squirrel a better potential mate than another is beyond me, as they all looked like complete loons scurrying around this morning, chasing one another and sniffing what I can only presume was a lot of pheromones.
The camera feed was interesting enough that I ran outside when Fuzzball seemed to be leaving her nest to go "play" with the boys. But just enjoy the video and you'll get the idea.
So once again we've been graced with a mystery visitor in the treehouse, specifically inside the bucket. Faithful readers will recall that last year I stumbled across evidence that our otherwise tidy treehouse actually had a squatter over the winter. At that time I'd really no idea who it might've been; it had made a nest behind the door out of leaves and the cotton rope I'd left coiled in this wide metal pail. This year, however, he or one of his colleagues had just built the nest inside the pail itself.
Here's a little video of the nest, it's super cozy-looking:
Now generally speaking, I like to stay off the treehouse rope ladder all winter. Water can soak into the rope, then it freezes, then putting weight on the thing might cause slow but irreparable damage. But at the same time I really, really wanted to see who lived in this super great spot -- and clearly planned on wintering there.
So I did the only sensible thing; I brought the pail and nest inside the treehouse, bungied the door open for the winter (prevailing winds come the other way anyhow), dropped a long extension cord down the trap door, and set up an IP camera.
The surveillance state has landed inside America's treehouses.
The result was satisfying, and took just a few hours!
There's the cute little rascal. He seems most active up in the treehouse in the early evening, then hunkers down for the night and heads out in the morning if it's not too cold. My now-6-year-old daughter named him Fuzzball. We'll see if "he" has babies -- which the internet tells me is pretty likely, considering the quality of the nest and the timing. I'm trying to figure out how to make this incredibly interesting view available for public view, which is taxing my meager technology skills.
While we wait for spring babies, my daughter and I also go out whenever it's mild enough and shoot peanuts up to the treehouse deck with slingshots. Which is way more fun than it should be. :)
My daughter was kind enough the other day to demonstrate the proper method for climbing down our treehouse rope ladder -- assuming you're 40-odd inches tall and six years old, it will work great for you. The cameraman has a few more difficulties, but it's of course worth it. :)
I do believe I'll have to re-stain this year, or next at the latest. The rope ladder rungs have fared pretty well, but I don't think they're totally immune to the weather just because they're right under the treehouse. The problem will be figuring out an "easy" way to stain a rope ladder rung that's going to stay on the rope while it's being stained. This will take some deep thought... perhaps I'll sit up in the treehouse this week and mull it over. :)
Today was a nice warm Sunday, and the kiddos were playing in the sprinkler and going up and down the treehouse rope ladder pretty much all day. The treehouse has become a part of everyone's summer here, and we're so lucky to get to enjoy it.
So the kids were exhausted and I volunteered to climb up and bring down the towels and blankets and what-not that had somehow ended up there after everyone went home. While I was there I tidied up a bit, and happened to discover I'd been altogether wrong about the treehouse's vacant status over the winter....
Treehouse Construction Seems To Have Held Up Nicely
Finally, a treehouse post about tree houses! About time, am I right? :-)
With apologies to readers who are a little tired of beekeeping stuff (did I mention I stuck my finger in a swarm??), I did find my way up to the treehouse with the camera for a good look-around. I couldn't have been happier!
Things are looking great, the treehouse hardware, the platform, the roof -- everything held up through the winter and the kiddos have been treehousin' at every opportunity. I will have to replace my basket rope, though ....
I know, I know. It's turning into a beekeeping blog. I promise, there's a lot of Treehousing to be done here in a bit. But the bees have been so darned interesting lately ...
Today, the swarm that had been threatening at our hive finally happened. It's a pretty amazing thing to watch -- and in the end, we had a friend over who collected a bucket o' bees to start a new hive on his property.
The wonderful part is, of course, our bees in the hive are doing great -- so great they needed to expand their operations, so to speak.
So my wife added supers today to the top of the hive -- she has them so nicely decorated, after all -- and the bees skedaddled out of there and were buzzing about somewhat madly. They often do this, but the hive is so strong this year it was pretty amazing to see.
That's about half the bees that exited the hive, the rest are swarming around -- you can see them in this video, which also finishes up with my first-ever time lapse. See that black windmill in the photo? That's where I stuck my phone to do the time lapse.
So what's happening? My wife thinks she disrupted some swarming behavior -- she spotted some queen larvae when she had the hive open -- so some (or all) of the bees were getting ready to leave because the hive was too hot, or too small, or otherwise unsatisfactory. Adding the boxes on top should give them room to do their thing comfortably.
Interestingly, it took them about an hour to go from their "bearded" state at the beginning of the time lapse movie to get mostly inside -- you'll notice if you watch carefully, they seem to mostly make their way to the main entrance on the bottom of the hive. Interesting stuff.
My wife built (and painted) this lovely little dispenser for store-bought pollen for the bees -- sort of a way for them to get a little extra as the flowers are just starting out.
It looks like it was an awful lot of pollen all at once -- and now they're mostly avoiding it, probably because there are more flowers blooming. At any rate, it made me laugh.
Sometimes a harness is better than the best tire swing
So with a few of the leftover rungs from the treehouse rope ladder, I’d cobbled together a sharp-looking three-sided tire alternative for our rope swing. Three lengths of rope met at a single carabiner up top, and the kiddos could sit on the triangle of rungs comfortable. It turned out great, could hold three friends, was easy to attach and detach, and was the go-to whenever my daughter had friends over.
But when it was just her, she wanted to be in her harness and swinging free. Back when I hung the rope for the swing, I’d sort of guessed how much I needed and bought rope without measuring. Which meant I overbought. Which meant I had this “tail” at the end of the swing.
The cool part about the tail has been it’s been super easy to swing the kids with — easy to get them going without pushing. It works so well neighbors on both sides assumed I did it on purpose. I made no moves to correct them.
Here’s the kiddo swinging in her harness. Upside down, of course. And I still have no idea what she was saying, maybe some of you can figure out her rope swing glossolalia.
With the cold temperatures outside, I’ve been thinking about how honey bees stay warm in the winter time — and specifically thinking about our hive, off in the corner by our little garden.
We don’t think about them much with the snow on the ground; they stay inside the hive, clustered around the queen to keep her warm, honey at the ready to feed everyone through the cold weather. Sort of like penguins, they huddle together with the bees on the outside keeping the inside bees warmer — except, unlike the penguins, they don’t rotate. The outer bees take the brunt, and many of them don’t make it to spring.
Really interesting to me is that they do more than huddle; they actively make heat for each other through friction, wiggling their flying muscles without moving their wings. No matter how cold it is outside, the queen is kept at a cozy 90-95 degrees F — as long as the honey supply lasts. When it warms up, they’re ready to get out there pronto — a “cleansing flight” is a bee’s first time out of the hive to answer the call of nature, so to speak.
Neat little animals. I put together a video to show how we came by our hive — from a swarm that formed one afternoon right on our next-door neighbor’s tree.
The Chute-A-Phone: Want to throw your phone out the window?
Please don't make me put a disclaimer here that throwing your phone out the window might break your phone. Please.
So I was thinking the other day that it would be fun to have a GoPro or similar, to film some first-person footage of me messing around in the tree and treehouse — so people would have a better idea of what it’s really like up there. But those cameras are expensive, so I was looking for ways to strap my old iPhone to my head and do it on the cheap. People do it, but the results are less than optimal — plus there’s a good chance of dropping the phone, and when you’re 30-35 feet in the air, that’s all she wrote. I'm in no position to buy a new phone at the moment, frankly.
This started me thinking about how to protect the phone from a high fall. Which led me to thinking about putting a parachute on the phone. Which made me think, now that would be fun video to watch! This is what spawned the Chute-A-Phone, possibly the most stupid name for something in history. But it seems to have stuck, so, I apologize.
This project is so easy, so inexpensive, I expect my readers to build it and start tossing phones off of things right away. I mean, don’t break any laws or anything. But there’s no excuse not to build one right now and shoot some fun video.
You’ll need a large trash bag, and if you’re lucky you have a big round table to lay it out on. Start by trimming off the bottom edge and one of the side seals.
This will allow you to open it up like a book. Spread it out nice and flat; don’t worry if it doesn’t quite reach the edge of the table, it’s close enough. Cut around the table to make a big plastic circle.
Take some fishing line (or other lightweight string, about anything will work) and cut 8 lengths that are the same as the table’s diameter. Tie loops on both ends of each one.
Tear off a square of duct tape, and fold it in half over the edge of the circle.
Do this eight times all the way around, spacing them evenly.
Tear another strip of duct tape and again, fold it in half over the edge of the circle — but this time, slip one end of a fishing line loop inside. Repeat until you have all 8 of them attached.
Hook the other end of the lines onto a safety pin.
Close the safety pin before you forget, set it down, and get a big mess of knotted fishing line. Speaking from experience here.
Now when you lift up the safety pin end, you’ve got a parachute hanging from the other.
Next you need some rubber foam, preferably a block of some kind that’s got enough space for at least an inch or two all the way around the cavity you’ll be sticking your phone into. I had this from a box a remote came in, and it took just a little fiddling to jam my phone in there. I attached the safety pin with stretchy string, but you can use a rubber band as well, as long as it doesn’t compress your foam too much.
Jam your phone in there. Now, mine happens to be in an old Lifeproof case as well, so that helps. But really, if you’ve got no good case, use more foam. Get it in there tightly, and feel free to use additional rubber bands to keep it in there. Remember you'll start recording, then put your phone in, so plan ahead.
Set it up so it will hang horizontally (no vertical video!) and not fly out when it lands, more or less gently, on the ground. Now your Chute-A-Phone is ready to capture some stunning footage. Miniature BASE jumping!
I took mine up into the treehouse, got it ready, and sent it on its maiden voyage. I’m guessing it was about a 35-foot fall.
You can see I didn't "prime" the chute, but it opened after about 20 feet of fall and "wafted" for the last 10-15 feet. Here it is in slow motion, a little better:
Again, this is the same terrible footage I posted the other day (feel free to skip the long wait for me to climb down the treehouse ladder at the end of the first one), but bear in mind I only did it once, and I’ve not had a chance to Chute-A-Phone off other stuff yet — mostly because of this winter snowstorm business.
But that gives everyone plenty of time to make their own versions of the Chute-A-Phone. So get on it, friends!
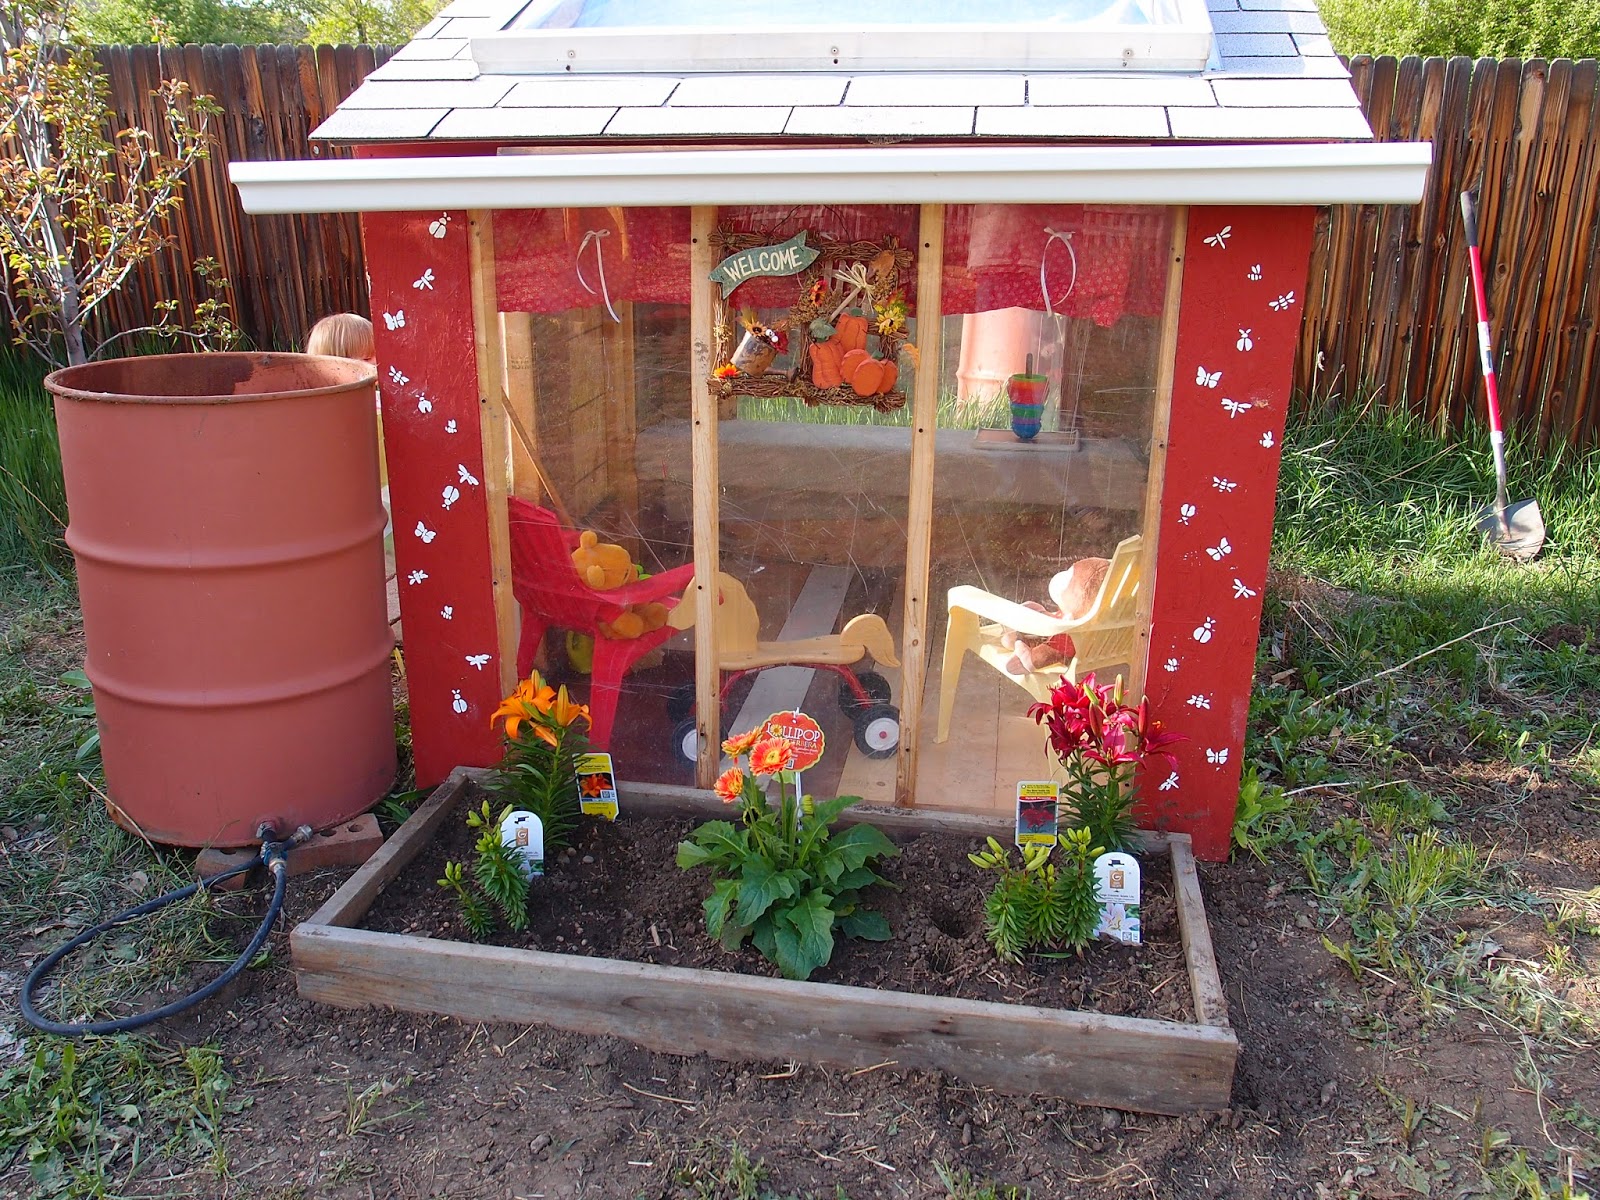
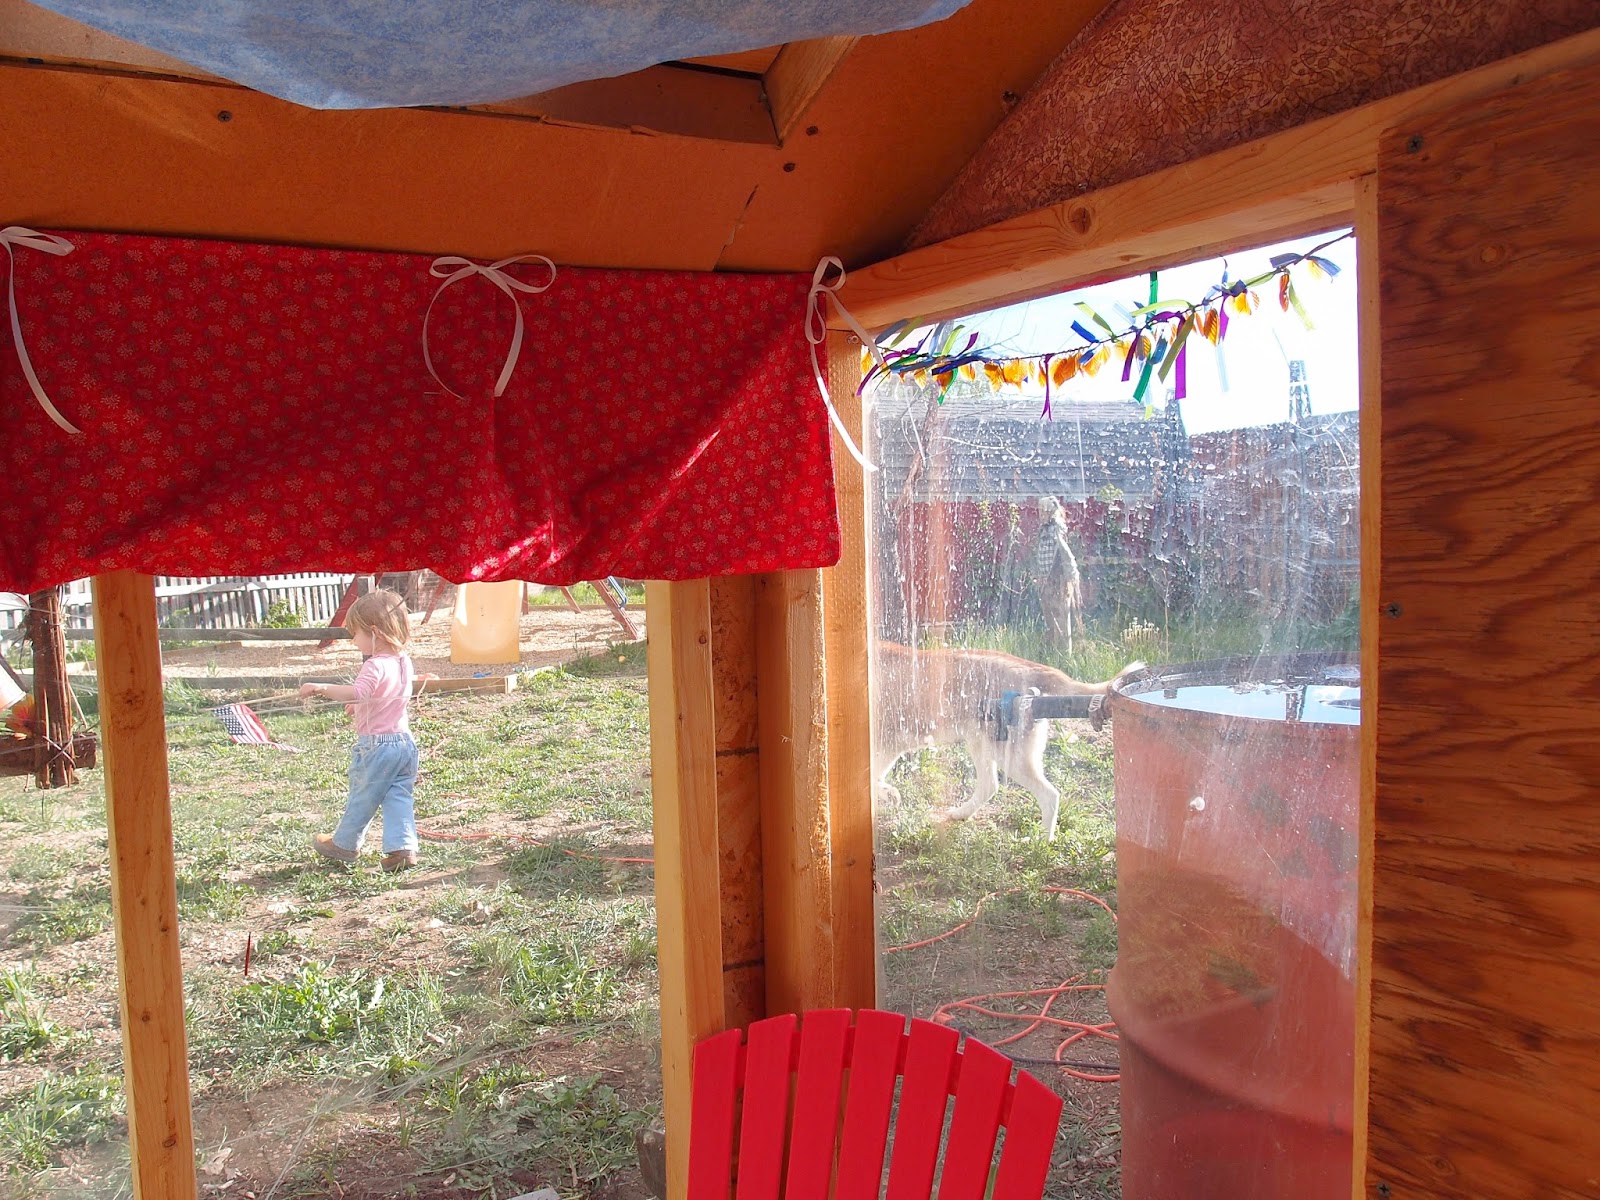
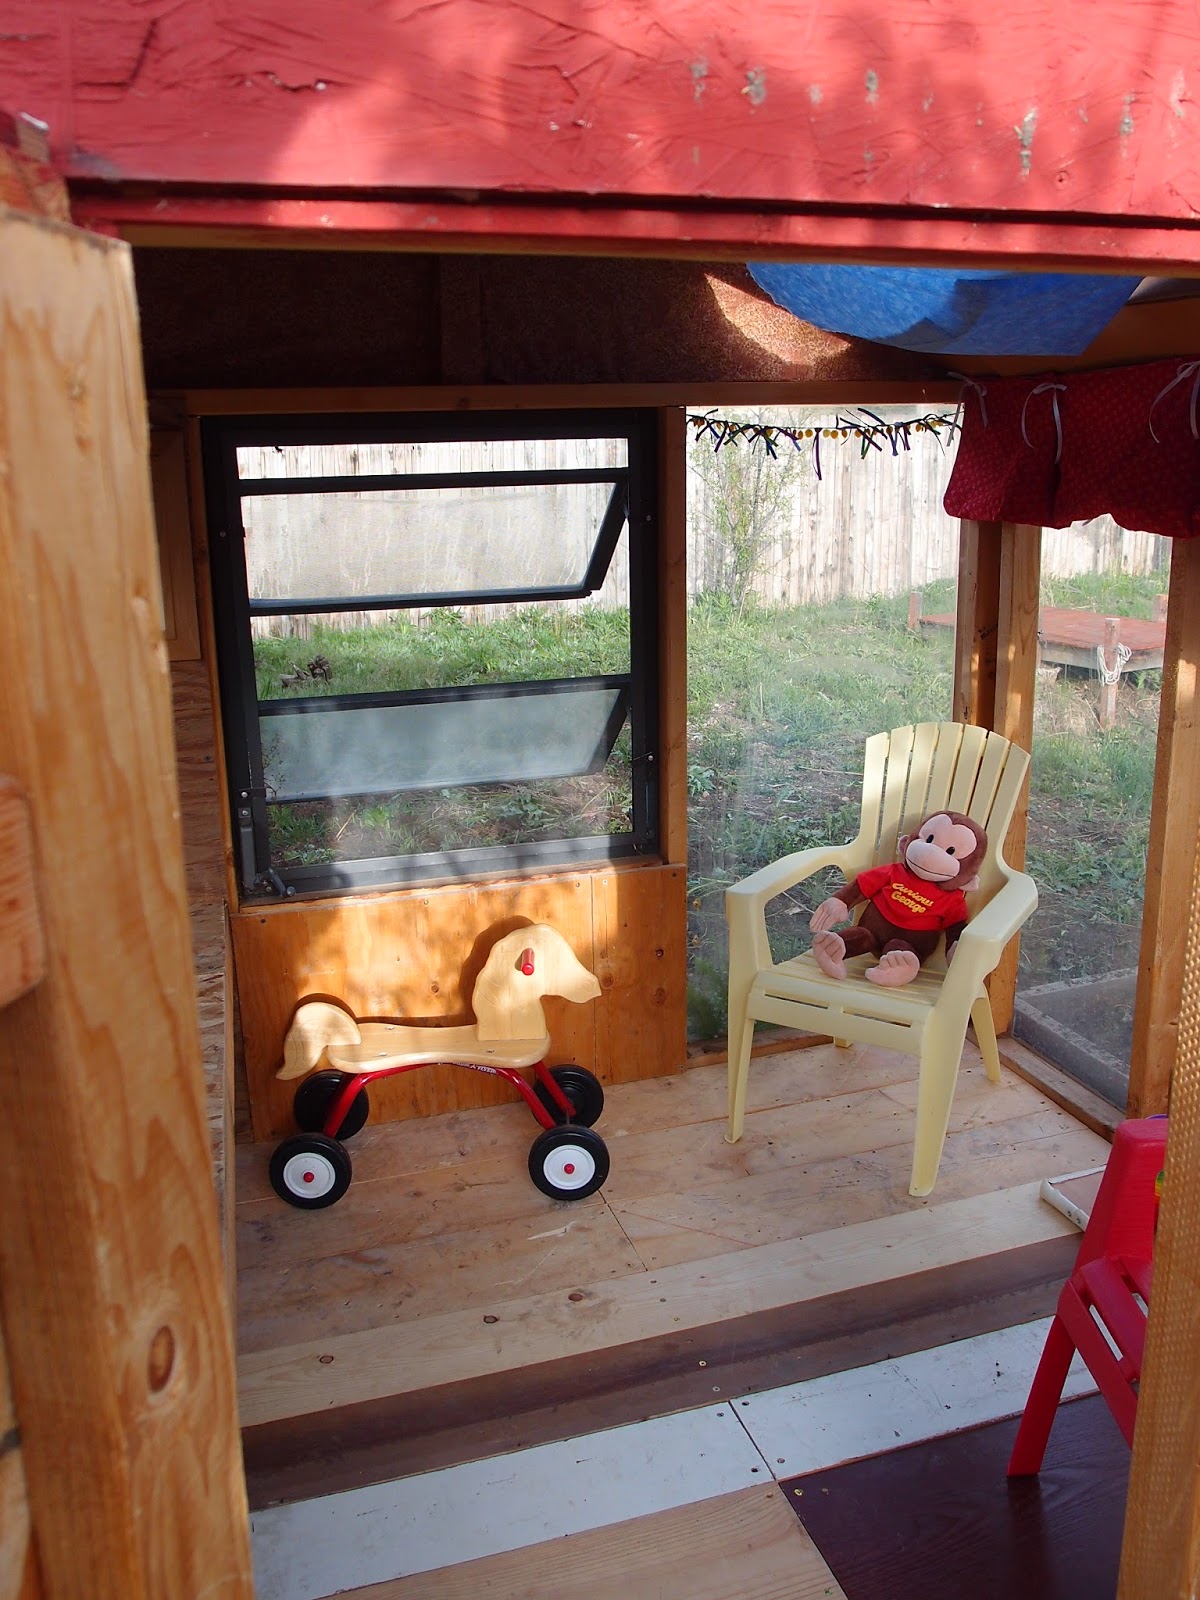
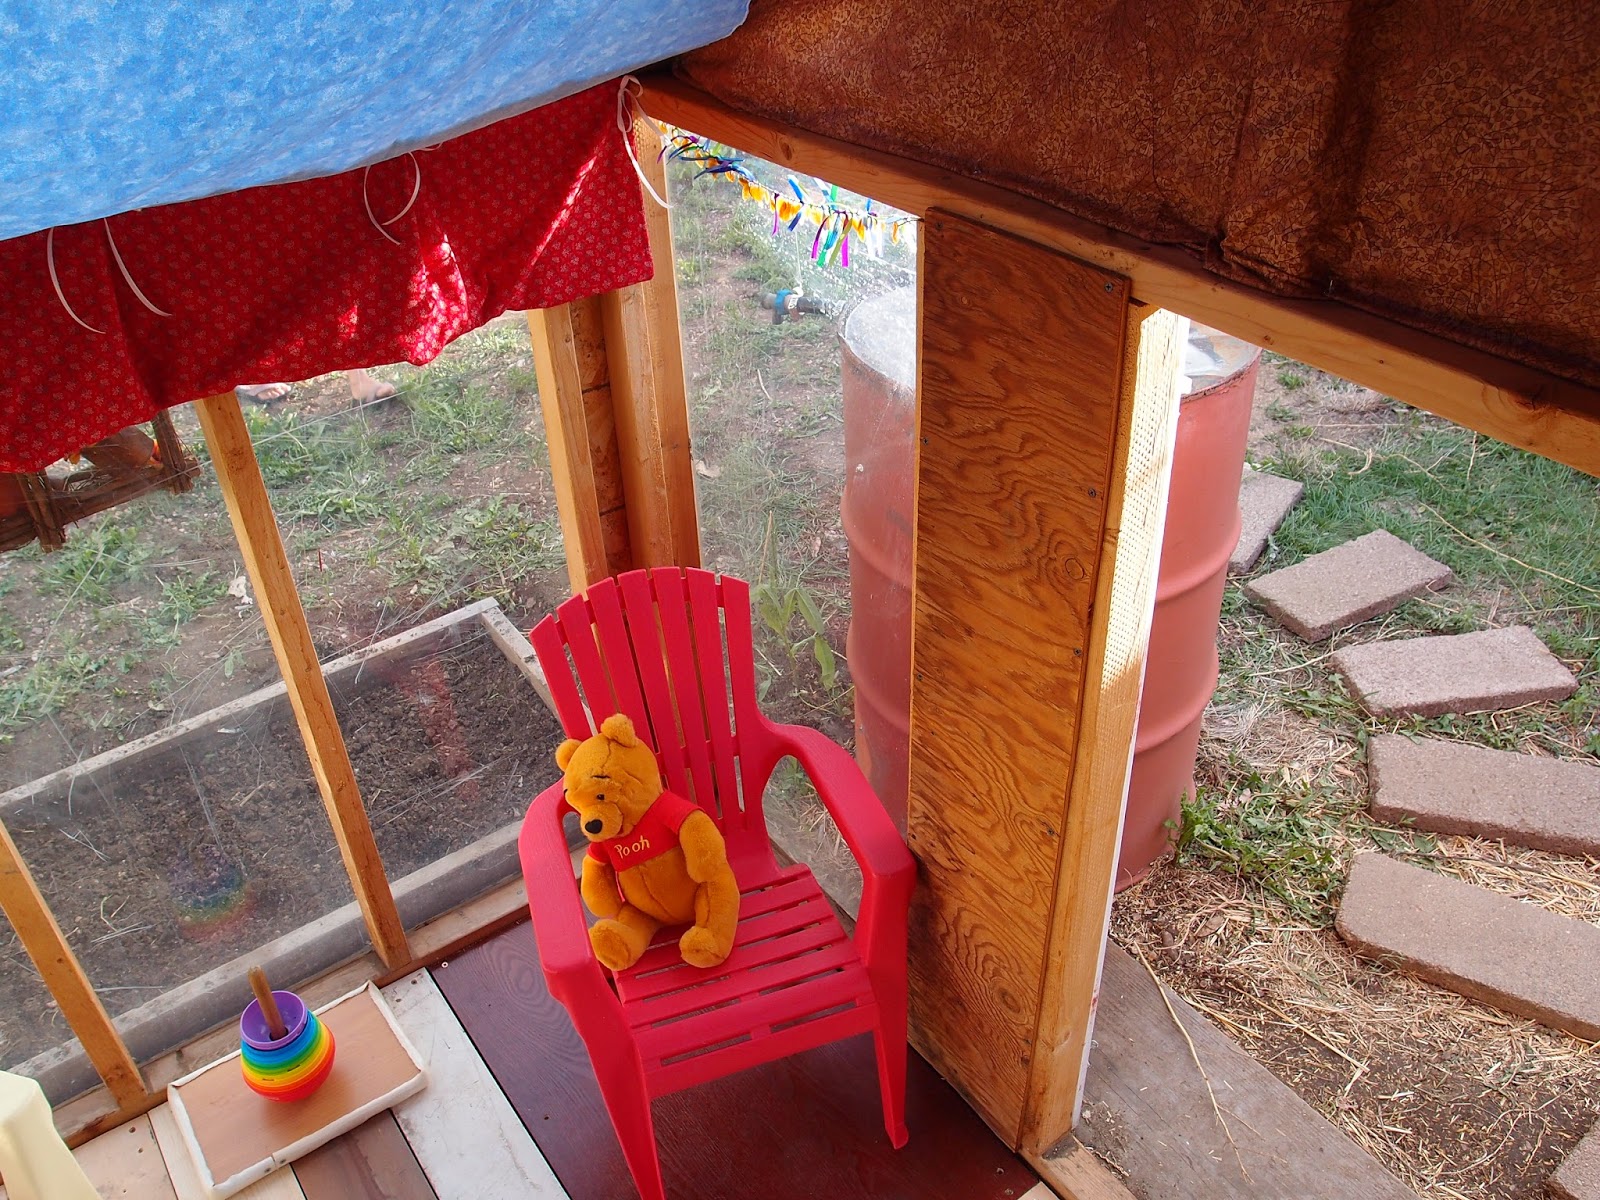
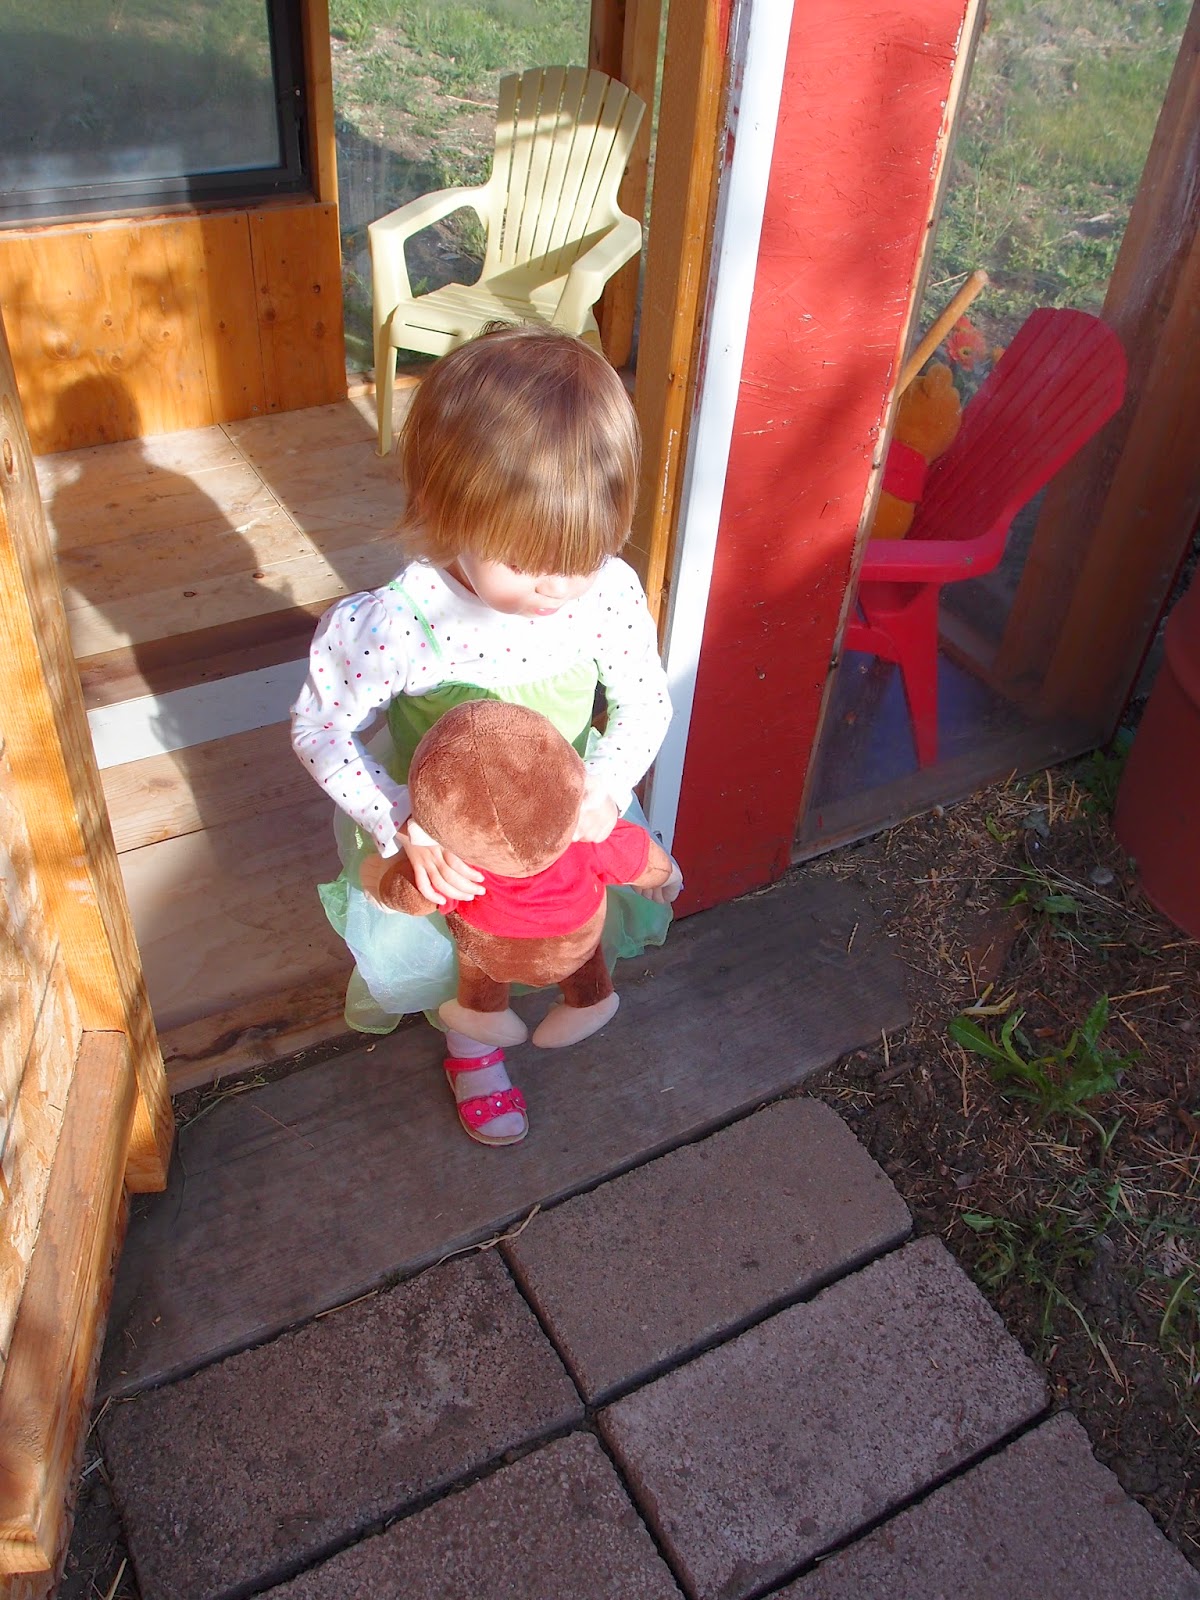
Final product (-ish) first for a change, here’s the playhouse as it ended up.
My daughter was pretty pleased, and enjoyed her time in there:
So this was one of my first little projects for her, done a few years ago. The initial steps involved a ton of weeding inside the coop, actually; the previous owners of our house hadn’t kept chickens for years, so the coop was working like a greenhouse for thorny nasty plants. Then there was a bunch of bleach to be sprayed, just in case; then the "airing it out" portion of the project. After a bit I put down this cement board I had lying around, just to see if it would be any fun to play in. My daughter figured out what was up (she was about 2 at the time) and started helping.
A better look at the plexi windows that were already in place. The advantage is they’re south-facing, so the coop (and eventual playhouse) is pretty warm in the winter. The disadvantage is you can see how a man’s yard goes to heck when he has a kiddo.
I pulled out the cement board and put down actual boards — in this case I took nearly every bit of random scrap plywood and deck-size board out of my garage and cut it to fit. There’s a 2x6 acting as a sort of joist underneath, as well as a bunch of cement pavers just to keep the floor off the dirt. I didn’t put too much effort into making it last forever, although it has (so far).
My wife added a cork board above the north window (which eventually became filled with kid art!) and some window trim. The little chicken perch turned into a shelf.
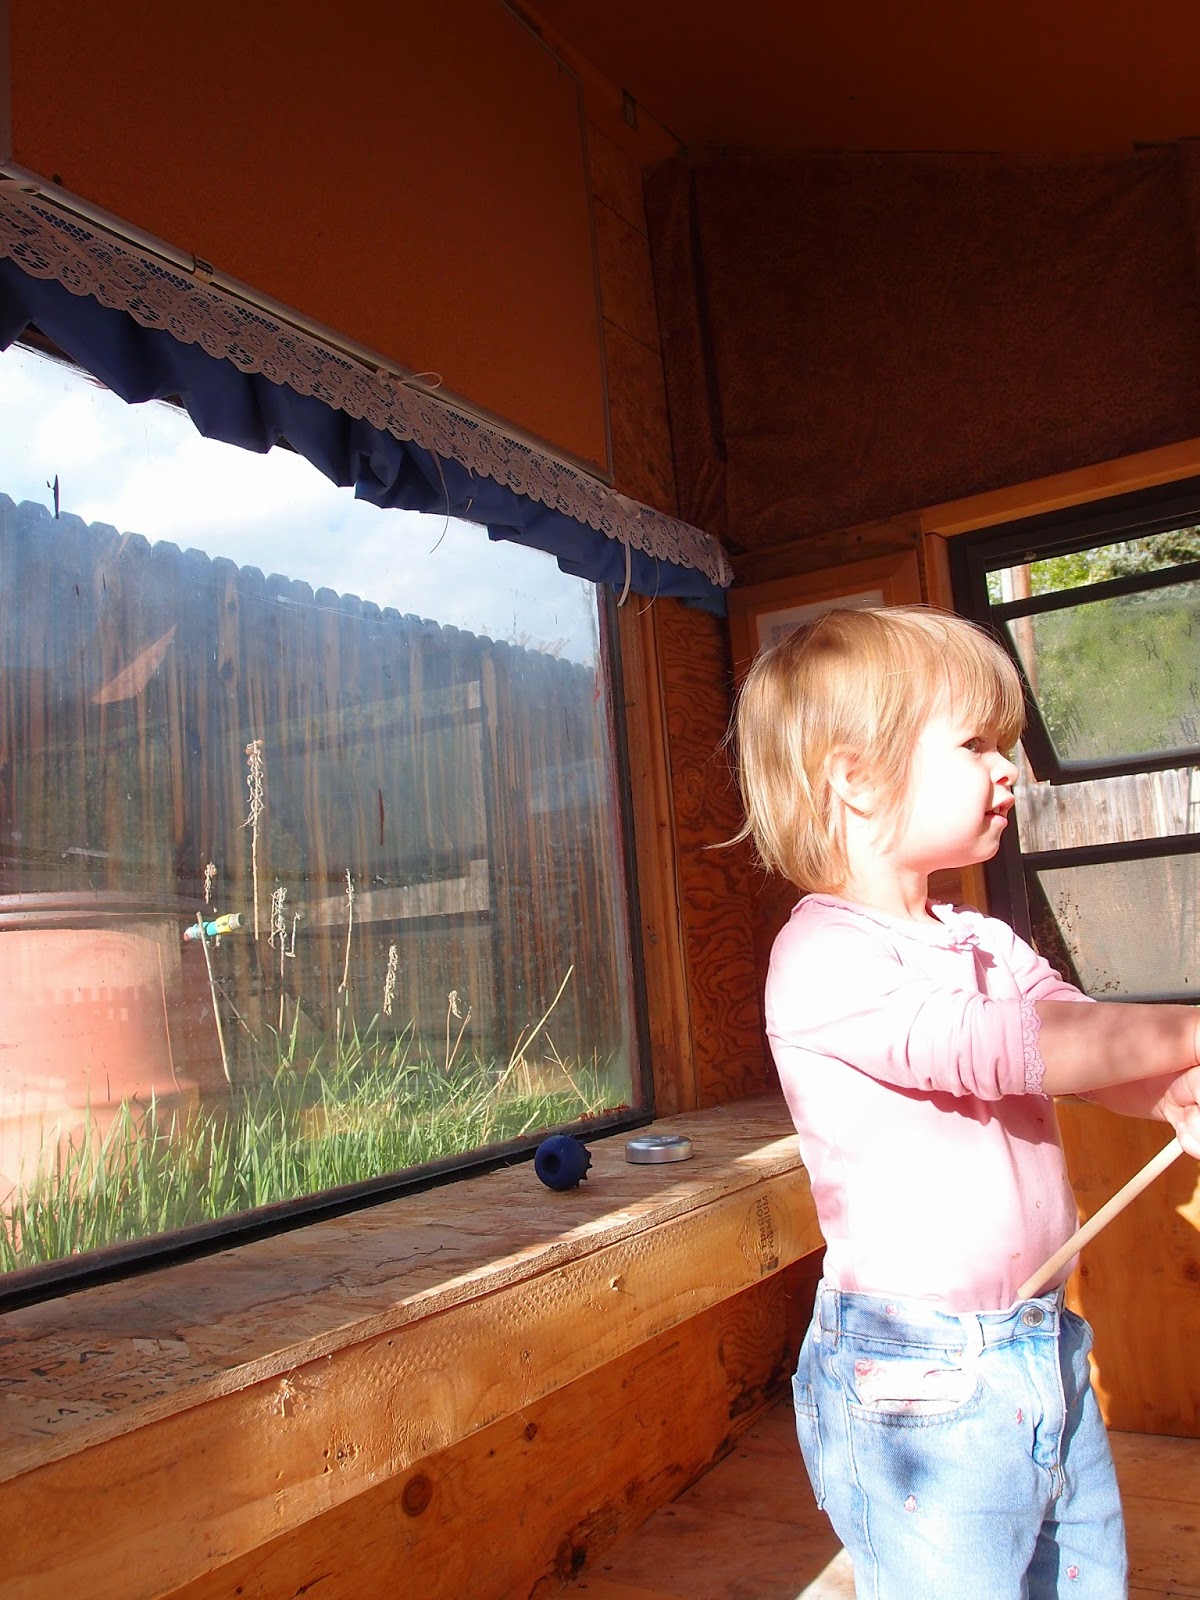
More window treatments.
To compensate for the state of the yard in general, we put together a little planter box. We picked out flowers the first year, but every year since we’ve let our daughter pick out what to plant. Some years are more successful than others!
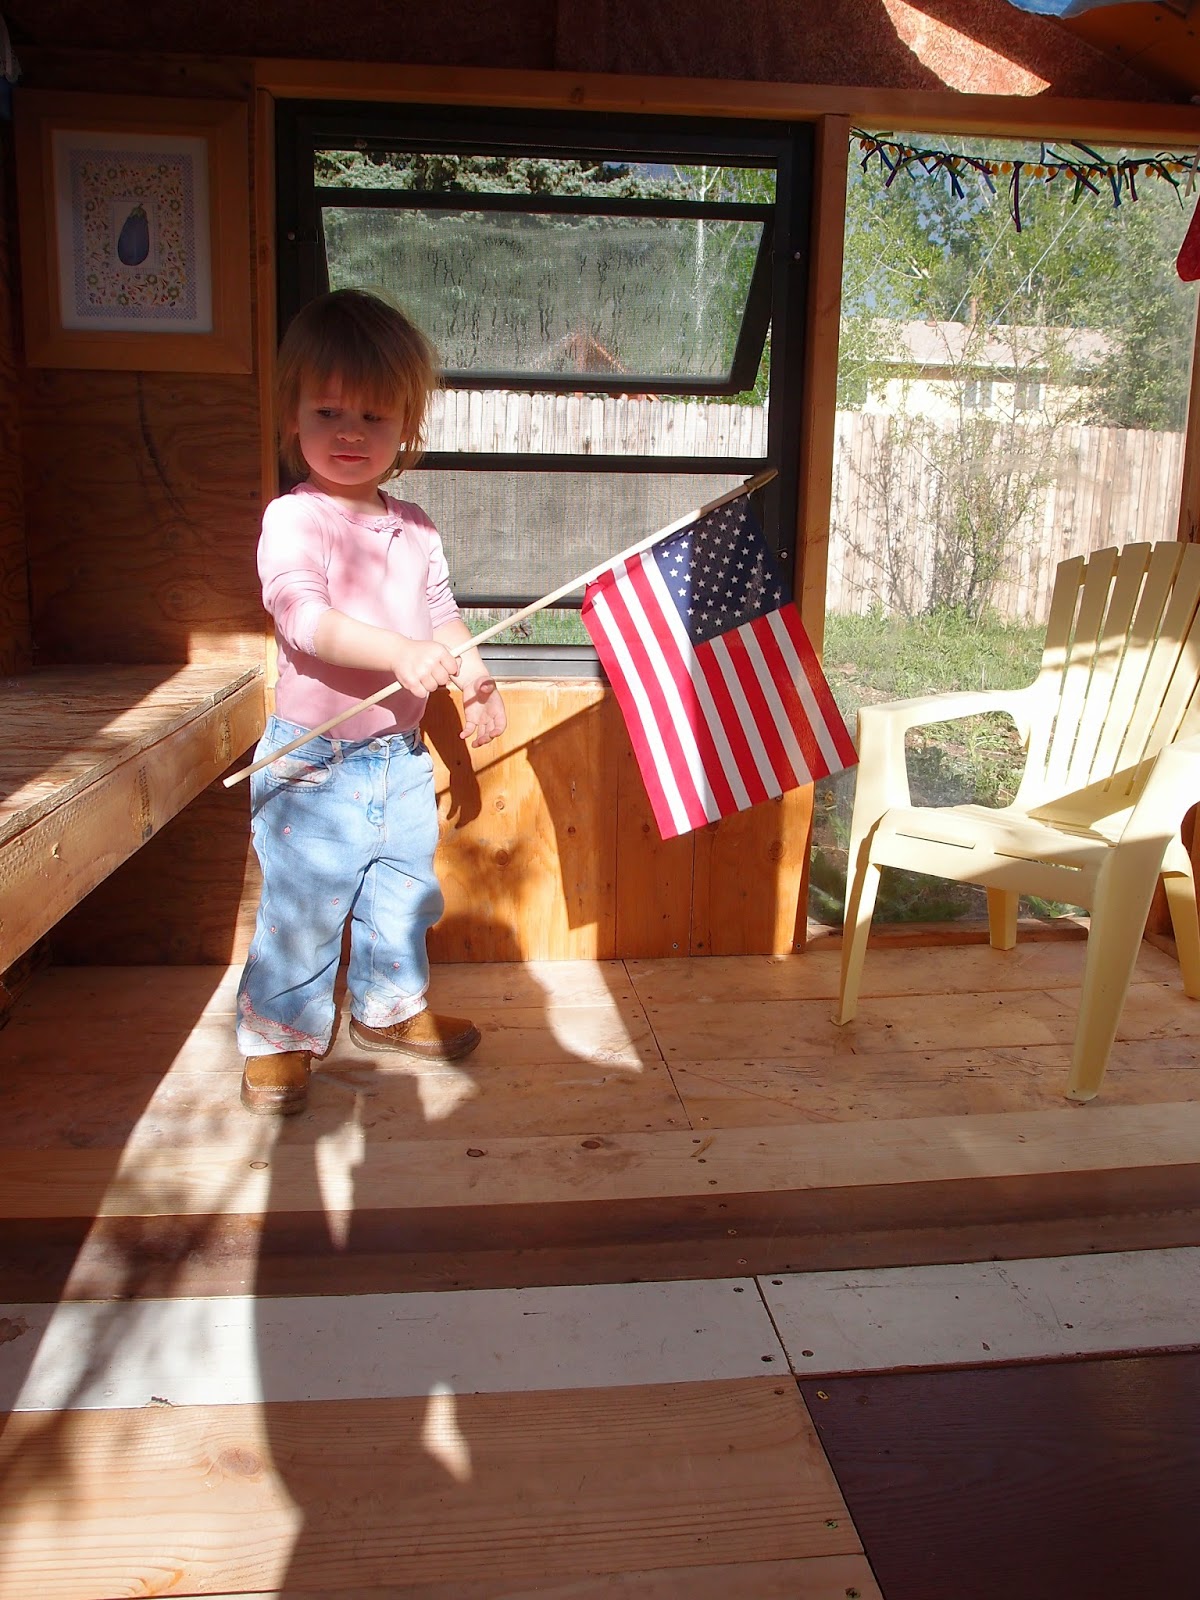
Moving in some friends, toys, and kid-sized furniture.
Pooh became a fixture in the play house.
Tinker Bell approved of the flower choices; my wife did some stenciling of butterflies, dragonflies, and other little critters around the house.
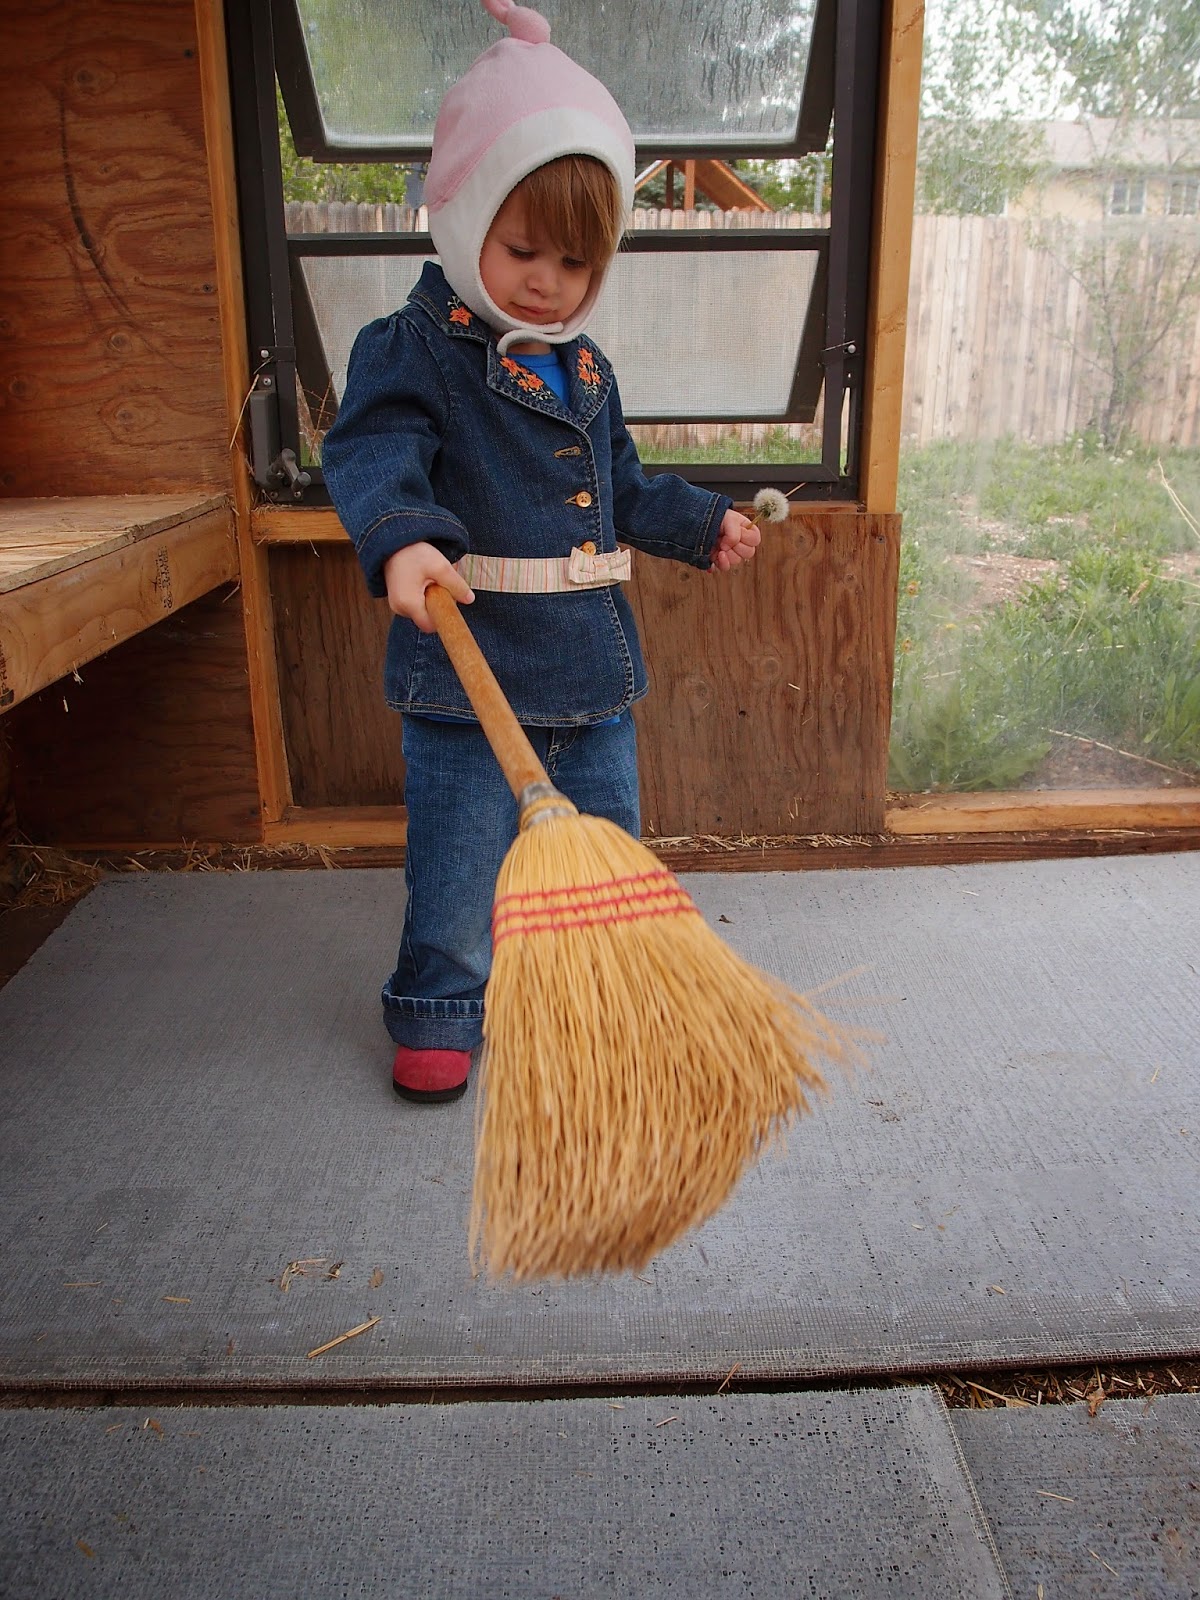
Ultimately I switched my paver plan around to make a little front porch. Something to sweep! Kids love sweeping until they're older.
I wrapped the little perch/shelf with a carpet remnant, which made it a little more fun for small hands to fiddle around with.
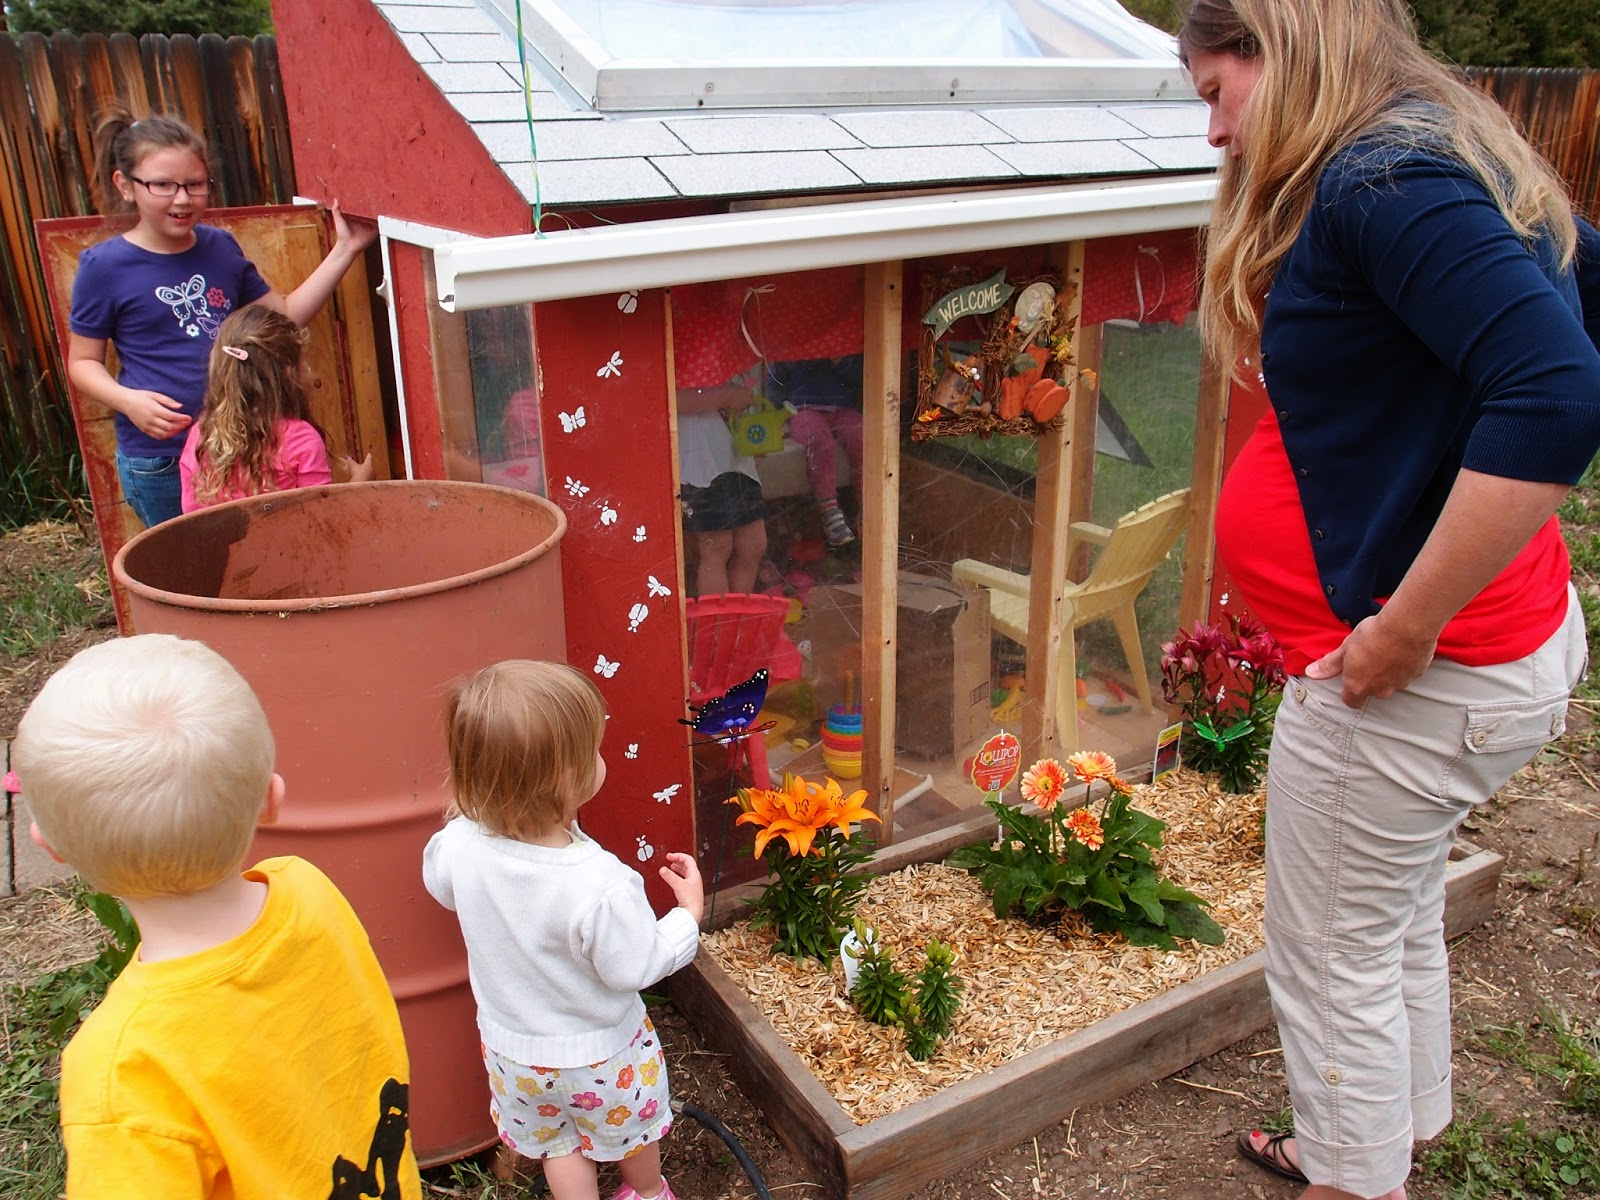
Open house! The neighborhood kids loved it, my daughter loved hosting.
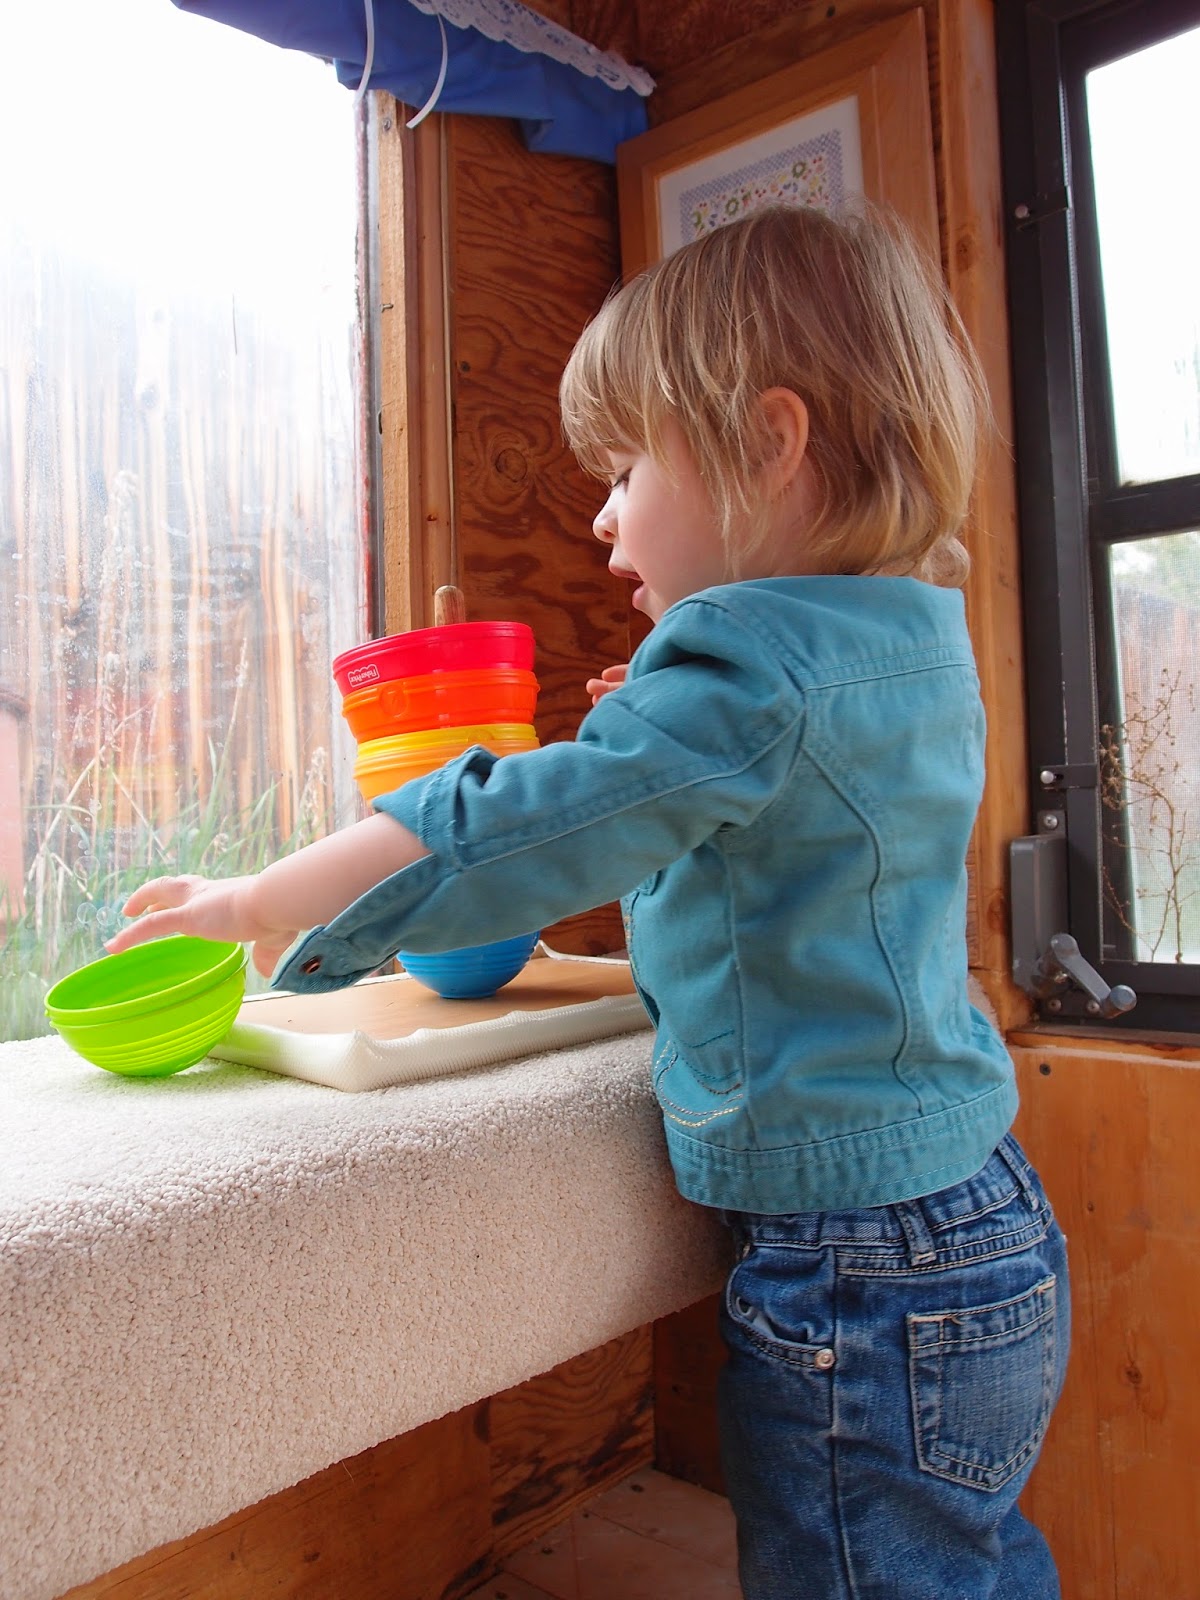
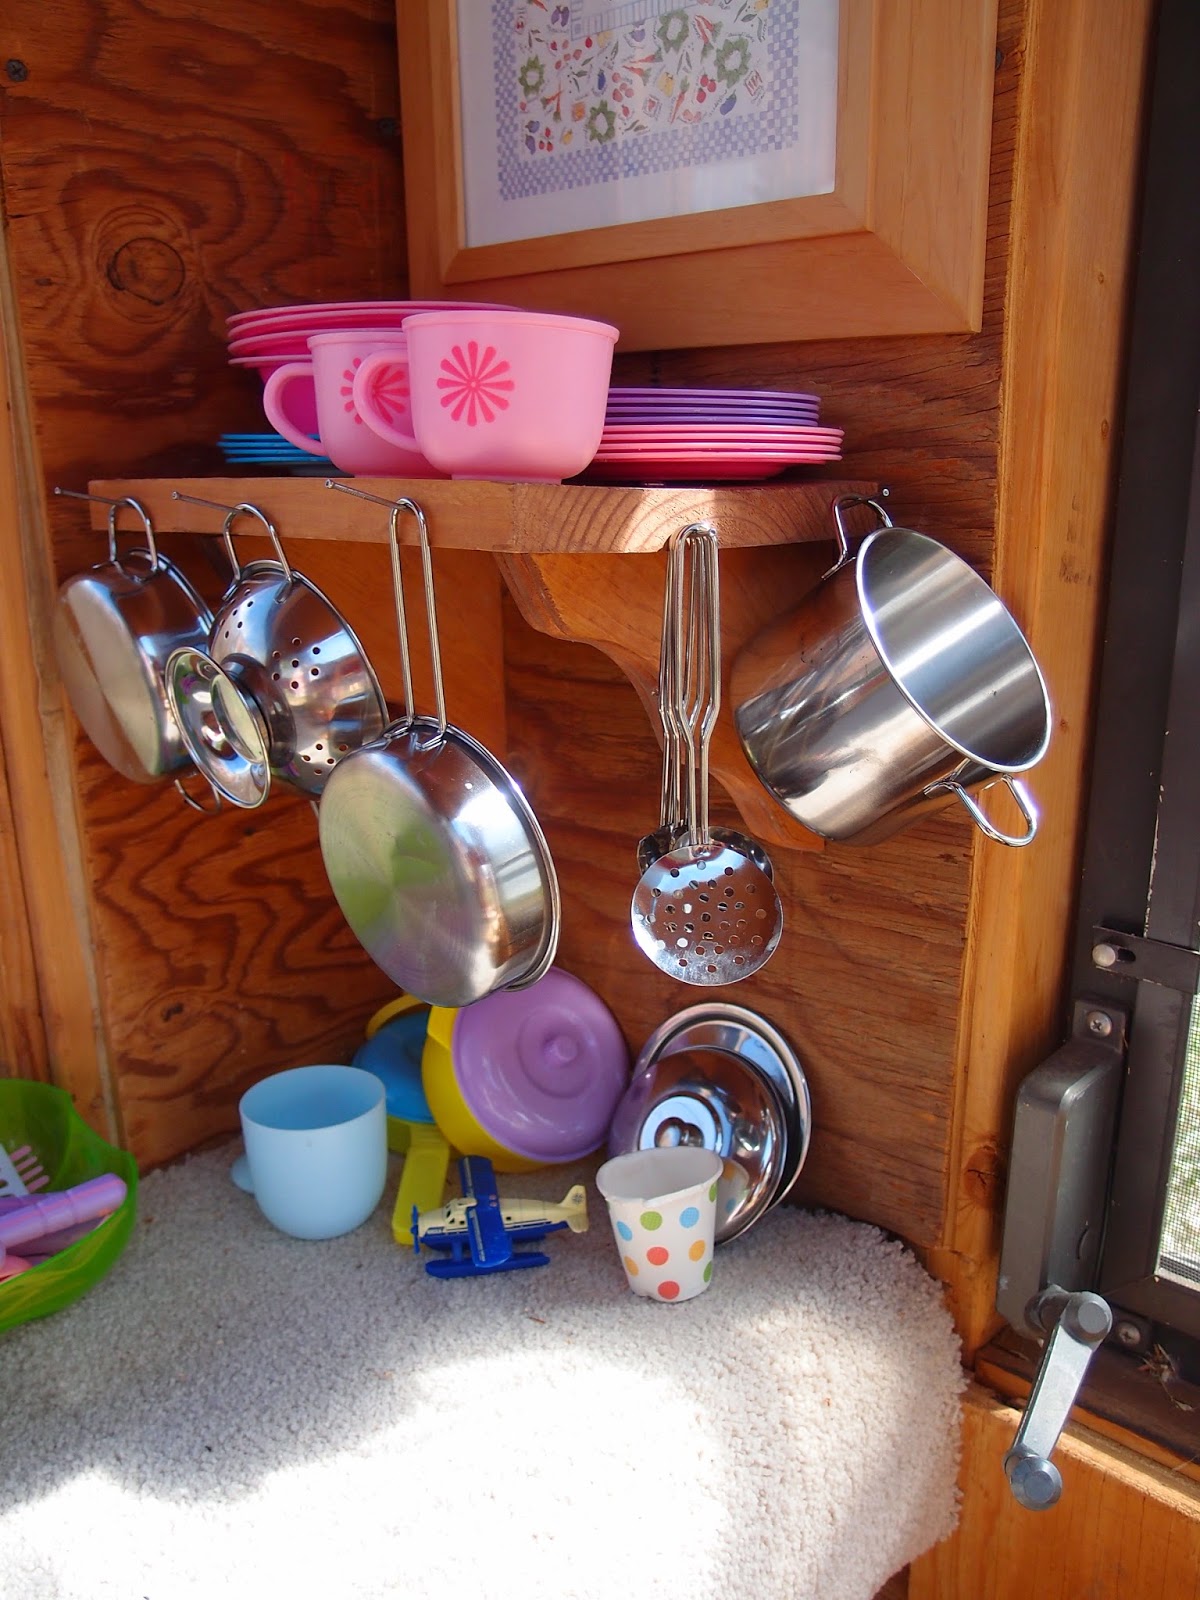
Later I made this little shelf for her cooking stuff; it sort of turned into a kitchen area.
The fun thing about this project is that now, years later, she’s starting to outgrow the playhouse (what with a treehouse out front and all), so she’s been letting us know we should think about converting it back into a chicken coop — and get chickens! We’ll see, I’m not sure I want chickens necessarily, but from my standpoint it’ll be an easy job switching back from playhouse to chicken coop again.
So typically my build stories come before video, but I've got a bit of a weather delay going here with the Chute-A-Phone. I managed to crank off a single test with the finished product just before the big snowstorm hit, so here's a little sneak peek at the thing.
This video has some boring parts -- most of it, actually, but particularly after the Chute-A-Phone lands and I have to climb back down the treehouse ladder -- so feel free to skip around, or frankly skip the whole thing and I'll have a build story posted soon.
Or, if you like confusing videos and guessing about what I'm on about, enjoy!
At this point it was just a matter of minor details around the Monster Tub. A small bead of caulk around the whole thing was of course critical; I also touched up around the shelving area. A couple of hooks will be great for towels. Or whatever else.
Glass bricks got framed in, too.
By late afternoon, it was pretty much a done deal.
By candlelight, it’s a very calming place. That's the overflow and drain plug release there on the left.
Finally, finally soaking my weary bones. Ahhh…. Worth every second.
Of course, as much as I might pretend otherwise, the Monster Tub wasn't just for me. The beauty of a deep tub like this, if you have kids, is that if you don’t fill it up all the way, the high walls make for less out-of-tub splashing. To wit:
All things considered it filled up pretty quickly. Very minimal creaking underneath, thanks to the beefed-up floor. It’s a lot of water.
I’d purchased a couple of boxes of a filled travertine tile (again, on clearance), and wanted to use it in the bathroom. Again, I didn’t need much — particularly after the tub took up a third of the bathroom — so to make my life more complicated I decided to turn the 12x12 tiles into some smaller ones and make a pattern. I picked up an affordable wet saw, rigged up a straight line to cut across, and went to town.
I made a bunch of these, basically.
While I was reading about how the heck to lay tile, I decided to take care of the “no door to the bathroom” problem. I found a door on Craigslist, and started framing a wall for it to sit in.
I also wanted a way to keep a bunch of the light from the bedroom coming into the bathroom (I was worried it would seem dark after not having a door at all), so in addition to picking out a half-glass door, I left a hole for some glass bricks. They were fun to put in.
I’d eventually put in a sheer curtain for the door.
Back inside the bathroom, it was time to do the tile floor. Cement board came first.
Then I started on the tile. It was brain work remembering my pattern throughout.
Spacers!
White grout and some trim. I also cut the waste pipe down to attach the toilet flange.
Which foretold the return of the toilet, to the delight of the entire family.
The Monster Tub was almost finished — all that was left was a little touching up, and my first soak.