Friday, January 30, 2015

Treehouse Story: The Mystery of the Loose Cable

Are your treehouse cables loose?

So a couple of extraordinarily detail-oriented and sharp-eyed readers pointed out that it almost looks like the cables supporting the north end of the treehouse platform are ... loose? How can that be?

Here's a close-up picture.

Looks a little sketchy.

The question was, of course, if those cables aren't supporting the main treehouse beams, what is? Well, it's a bit of a trick of the eye: there are actually two wire rope slings on each side.

Why? Well, when I ordered the original treehouse support cables, I felt confident I'd handled the issue of load well -- each had a working load limit of 2.5 tons, or 5,000 pounds, and would be holding one-quarter of the weight of the treehouse and occupants, which I estimated would never top 2,000 pounds (1,000 pounds of house, 1,000 pounds of people, both high estimates). Essentially 500 pounds on something rated for 5,000 seemed pretty reasonable -- and that's a working load limit rating, not a breaking-point rating.

Then it struck me: manufacturing problems happen. It's rare, but possible. The wire rope slings weren't terribly expensive. And I'd be faced with a huge problem if one of those slings failed. So I ordered two more of the same rating, but slightly longer, and slung them loosely around the treehouse beams, as a backup. Took all of ten minutes to get them in place (and bundle them in with a couple of white zip ties, which you can also see).

So it's an overkill, again; like wearing a belt and suspenders. But for the small investment of time and money, it's a nice extra treehouse safety feature.


Back to the previous Treehouse Story: Shaky-Cam!

Wednesday, January 28, 2015

Treehouse Story: Shaky-Cam!

Treehouse Construction Video!


I completely forgot that I even shot this. It's a few seconds of looking around from my little perch by the permanent anchor, before the decking was even up. My hands are shaking quite a bit, I believe I took this while I was still adding hurricane clips (so putting in a lot of nails) connecting the treehouse platform framing to the main beams.

It's a bit jerky as well, I apologize. But it sort of gives an idea of how I was spending my days at this point in the treehouse build. I recommend clicking on it and watching it in HD, full-screen -- either here or on my YouTube channel. :)


Previous Treehouse Story: The Mailman

Monday, January 26, 2015

Treehouse Story: The Mailman

Treehouse Stories: The Mailman


So I forgot to tell a slightly amusing story about the treehouse construction project. It happened while I was up in the tree, I believe I was in the middle of putting several hundred screws into the treehouse wall panels.

Anyhow, it's a hot day, I'm sweating like anything. I've already been up and down a few times to retrieve tools and what-not I forgot to bring up, and that's tuckered me out. Plus I've had to backtrack on a few different things and re-do some stuff, so I'm feeling a little overwhelmed.

Up drives the US Mail truck, and out pops my mailman. I should point out he's been watching every step of the treehouse build, just because I'm building it mere steps from (and 30 feet above) the mailbox. We've had a lot of friendly chatter back and forth, often when I'm up in the tree; he's asked a question or two, just general neighborly stuff you'd expect from the mail carrier.

Today he tells me he's got something I need to sign for. And he looks at my face up there in the tree when he says it, and immediately says, "Hey, I've got an idea."

He goes back to his mail jeep and grabs a paper clip, and comes back out. "Send down a line, I'll clip the form and a pen on it, and you can sign it up there!"

So I do. He's obviously pretty amused about the whole thing, and that brightens my mood. I thank him from above several times for not making me climb down and up again. He clips the big envelope to the rope, and I haul that up too. All the while he's laughing to himself.

"You know," he finally hollers up, "I think I'm the only guy I know who's delivered mail to a treehouse. This would be a great ad for the Postal Service. We deliver anywhere, anytime!"

Saturday, January 24, 2015

Part 18: Some Treehouse Building Thoughts

Still want to build a treehouse? 

The treehouse on a sunny winter day.

So it’s winter as of this writing, and the treehouse is pretty much dormant until spring. Or until a series of warm days.

I’d thought about insulating it for winter, but really, that would necessitate heating the treehouse as well, which would require a heater, which would require electricity/fuel, and so on. It didn’t seem that likely any of us would want to head up there with a foot of snow on the ground — and that prediction’s proven correct, I haven’t even been tempted.

As far as sturdiness, obviously I’ll know a lot more in the spring, but I can share that we had a tornado warning siren go off in our neighborhood during a thunderstorm that had the audacity to happen right after my daughter’s birthday party — the wind was blowing like crazy, the rain was sideways. Branches were falling all over, including several off the big tree. I figured there would almost certainly be some kind of damage to the treehouse.

Fortunately, when I climbed up the next day, everything was just fine. I inspected the support structure as well as the treehouse itself, even the roof — nothing had moved. It was even dry inside; the last kid down had remembered to close the window, and all the pillows and blankets were bone dry. Thanks, mystery kid!

We keep a couple of small lidded ottoman-type things up there for sitting on, and to store a few bottles of water and some pillows and blankets inside of. There’s also a walkie-talkie that stays up there, hanging from a lanyard hooked to the wall; the rule is to turn it on and check in with the ground as soon as they’re up and the trap door is closed. That rule is easy to follow, because it’s also a good way to ask for the adults to send snacks up in the basket that’s up there, tied to a very long rope (the final "resting place" of that cord I'd used to raise the first treehouse beam).

In the summer, with all the leaves on the tree, you don’t even notice the treehouse walking down the street until you’re right under it; in winter, it can be seen for blocks in every direction. I find people stop and look from time to time, and about every two months someone gets out or comes to the door to tell me how neat it looks, or to ask questions about how one thing or another was done (usually it's the process of installing the treehouse bolts that seems most impossible to them). And I'll talk their ear off.

I’m always happy to talk about the treehouse.

On to: The VW Bus Bed or The Solar Stock Tank Swimming Pool

Part 17: Finishing the Treehouse

Finishing up the treehouse

This was the part of the process where my wife really shined: making a 30-foot-high treehouse inviting, beautiful, and fun. First up were some plastic flowers for the flower boxes; you can see them from the ground, and they look fantastic.


We’ve got them weighted down, with just a little bark filling in for effect.


Decorations on the deck and inside made things super homey.


Leaves on the tree started to fill out just as we were finishing the project — well in time for my daughter’s birthday, thank goodness.

It felt pretty magical, all surrounded by leaves.

The addition of a trap door meant we made a rule that once you were inside, you’d close the door — it was safe to walk on when closed.

Note the little basket; it has a long cord (remember the one I used raising the treehouse support beams?) for bringing stuff up and down.

Finally, I found a large piece of netting online, and wrapped it around the entire ladder.

Another one of those relatively simple sounding tasks that took forEVER.

I stitched it up the side with parachute cord, sort of like I was closing up a turkey. At the top I took more parachute cord and wove the net up to a bunch of eye hooks I'd attached around the opening.


With a few pulleys and some rope, I rigged a quick system where I could raise part of the rope ladder and lock it off 15 feet in the air — ensuring no one would be going up in the treehouse without me knowing about it. Eventually I'll do something more permanent, probably using wire. But this did the job. Excess rope at the moment gets coiled into a plastic tub with a lid at the bottom.

The treehouse looks a little like it's out to catch crab.

The final result looks great; at her birthday party, my daughter and her friends enjoyed going up and down as much as playing in the treehouse itself. We sent up walkie-talkies, snacks, blankets, pillows, dolls, toy fairies, you name it — the treehouse was a huge hit.

Back to the beginning of the Treehouse Build.


Friday, January 23, 2015

Part 16: Hanging The Treehouse Rope Ladder

Attaching sections of rope ladder to the treehouse

What I thought would be a relatively easy part of the treehouse construction project turned into a pretty large amount of work; getting the treehouse rope ladder sections I'd tied properly connected and level took more time and effort than I figured.

First, the sections are pretty heavy. Since my safety line went up the west side of the tree, I thought I’d hang the ladder there and see how it shook out.


Kind of poorly, as it turned out.

It became obvious it needed to hang on the east side of the tree. Once the ladder settled a bit, I started going up and down it with a cinch strap. I’d connect the strap to ladder rungs on either side of a knot I wanted to move, taking up the tension with the strap so the knot could be untied. I’d move the knot until I figured it was level, let the rung in question back down to rest on it, then undo the cinch strap and look to the next one.


My workplace for the better part of a day.

It took a lot of fiddling, but eventually it started to look more or less level.


Or, "level in places."

Next I drilled holes in a few strategically-chosen rungs, and bolted opposing planks to them to make things easier on little climbers. This had the added benefit of stiffening things up a bit.


My eager tester.

The best part of adding the planks is easiest seen from the top. If you notice, there’s not much chance of someone losing their grip and falling particularly far, much less all the way to the ground down the middle of the treehouse rope ladder. I was super pleased.


Note the prototype trap door and additional grab handles.

You can also see in these photos I’d weaved a few hundred feet of parachute cord into an X-shaped pattern on all four sides, as a temporary measure until the netting I'd ordered arrived. This was mostly to reinforce the boundaries of the rope ladder in the minds of climbers, but it also added some tension and made the ladder feel more stable. I needn’t have worried, however; the weight of the thing -- and it's proximity to the trunk -- keeps it almost motionless as you climb, once you’re past the first few feet.

This was as long as I could keep my daughter (and wife) out of the treehouse. Up they came. 


The extra planks actually make it a little harder for grownups. We'll survive.


The consensus was that it was the greatest treehouse ever in the history of tree houses and greatness. Next we’d put the finishing touches on the rope ladder, and decorate!

On to Part 17: Decorating and Finishing Up the DIY Treehouse

Thursday, January 22, 2015

Part 15: The Treehouse Takes Shape

Building the Treehouse Walls

Once the weather cleared, I got back up onto the treehouse platform, took apart my "treehouse kit" and started raising the walls.

Fun fact: the playhouse kit's directions spent quite a bit of time making sure whoever was putting it together understood the importance of a solid, level foundation. A bed of gravel was suggested, as was concrete. Neither was going to work for me, so I knew I'd be fighting random bits of unevenness going forward -- building a treehouse is all about finding ways to work with the tree, rather than against it.

It was a bit of a trick standing the first two panels up (to make a corner) and screwing them together on my own — every slight gust of wind threatened to take a panel and toss it to the ground — but eventually I’d connected several of my pieces, and almost like magic a treehouse started to appear!

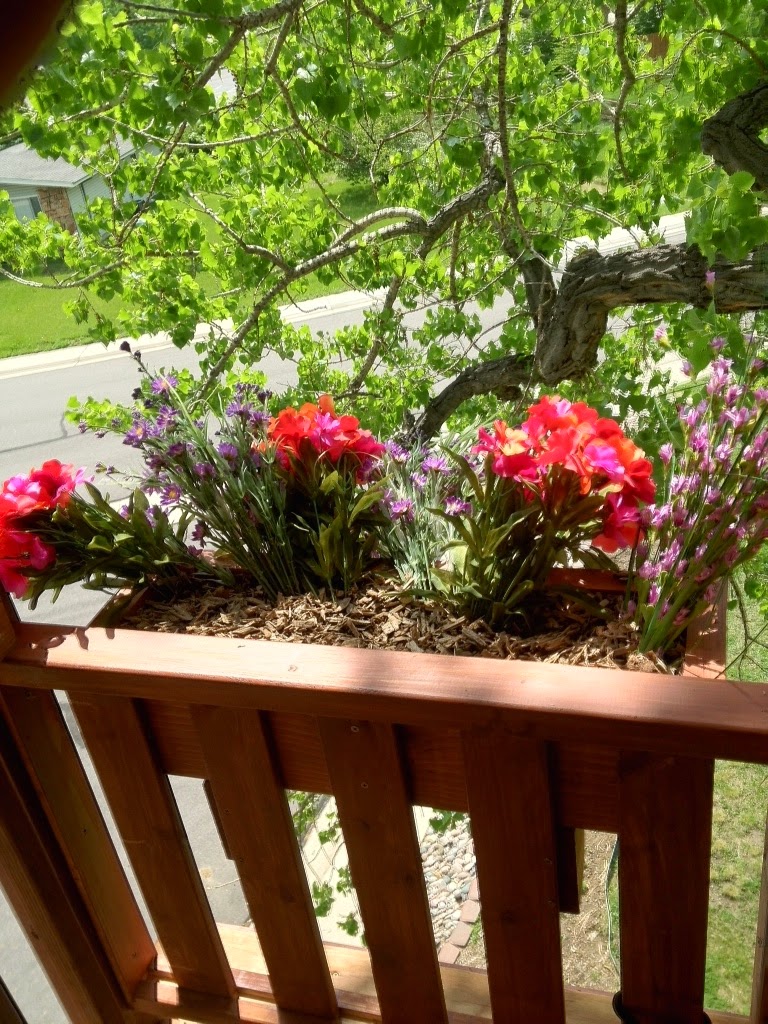
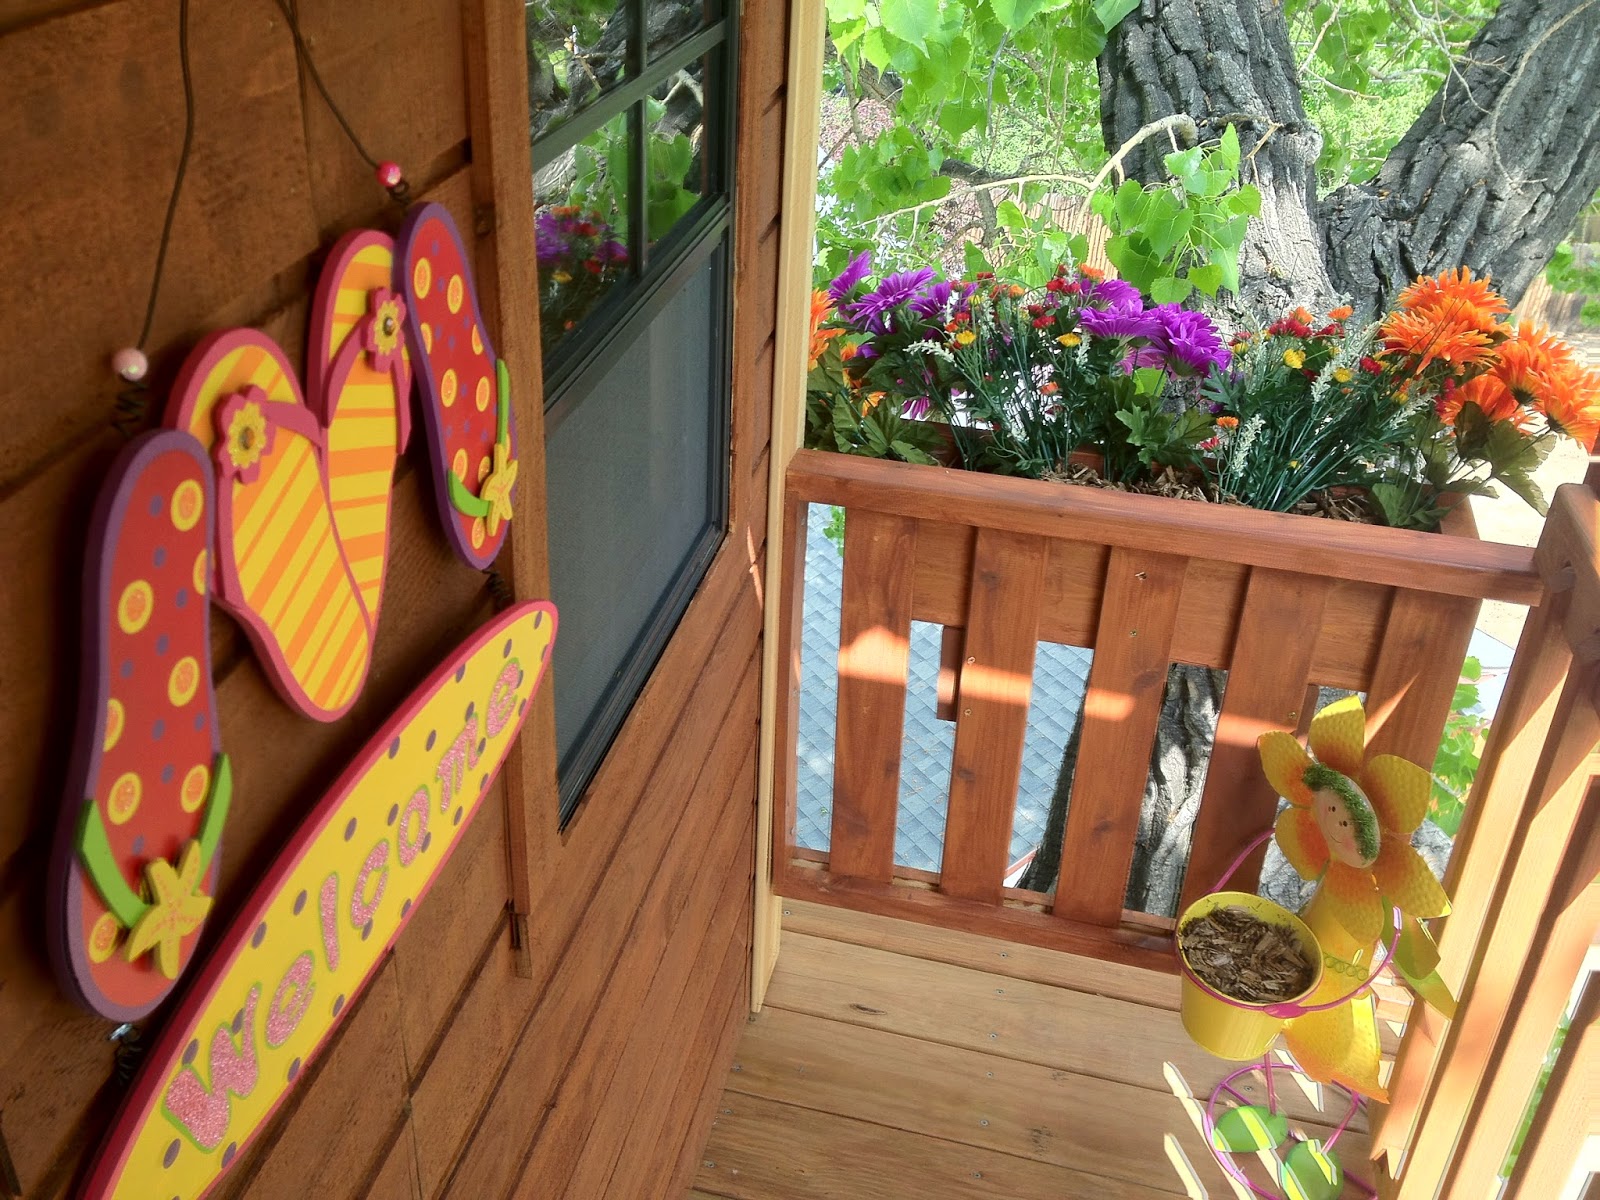
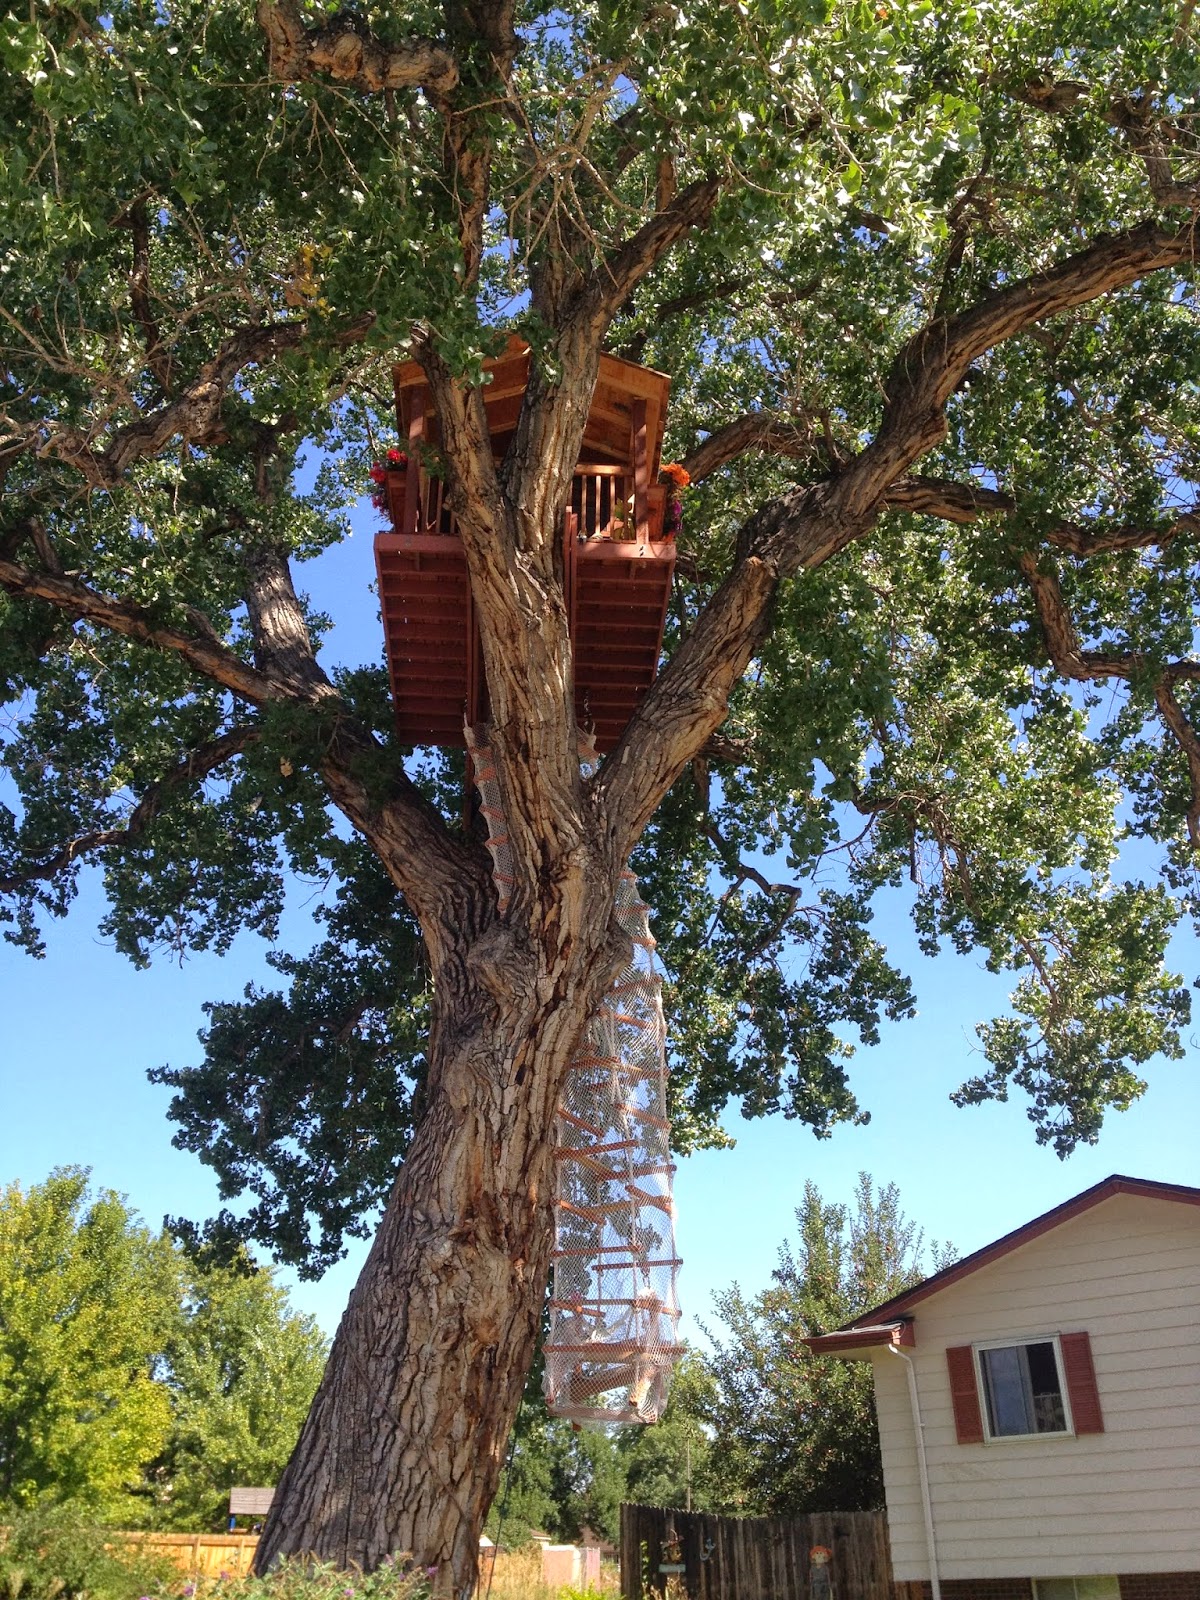
You can see how the 4x4 posts will create a little sheltered balcony of sorts on the south side of the treehouse.

A careful observer might notice one of my treehouse panels is upside down in this picture. I had to detach it and flip it the right way up.

Oh for crying out loud.

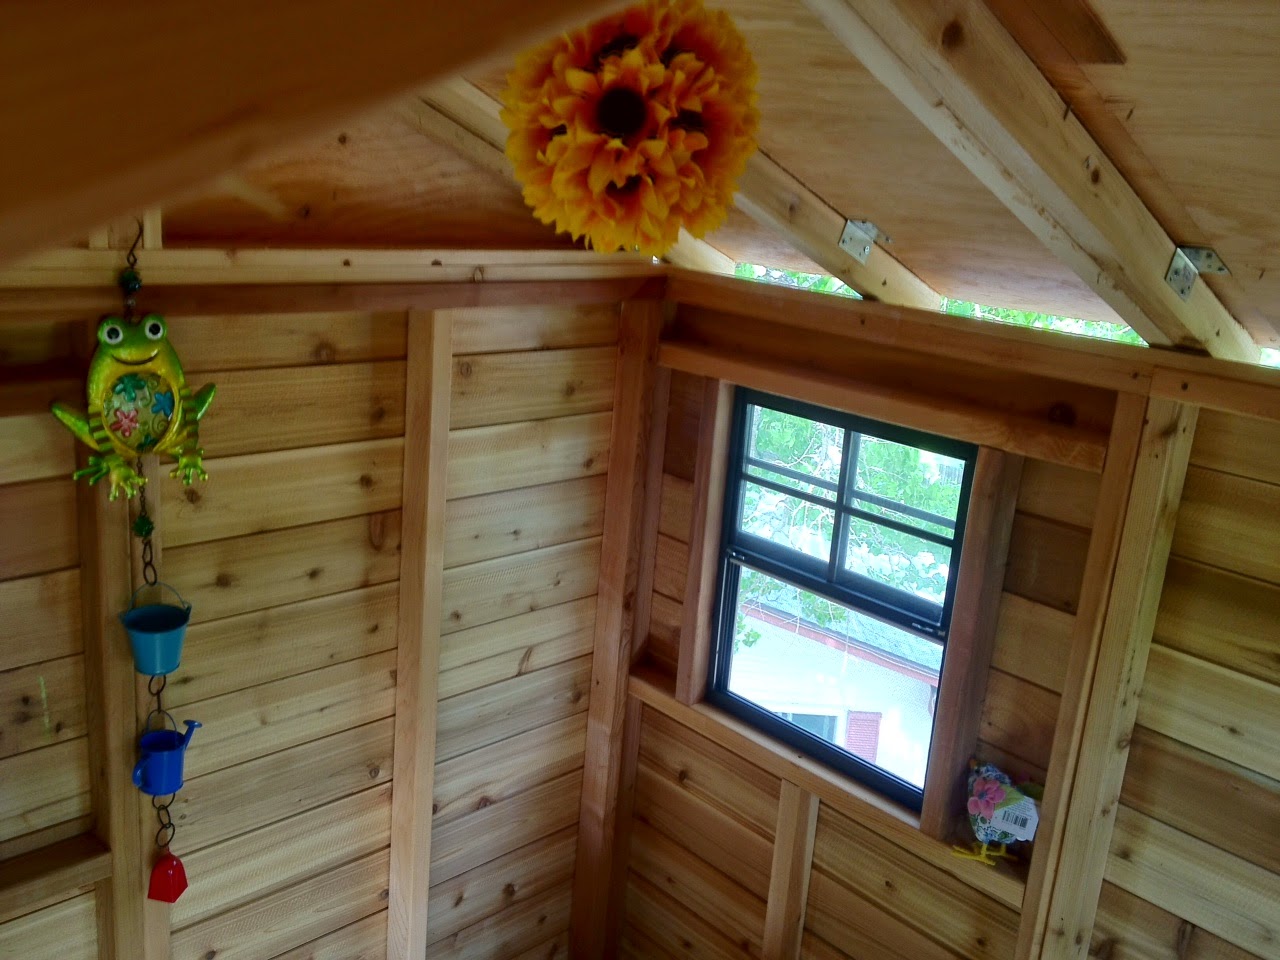
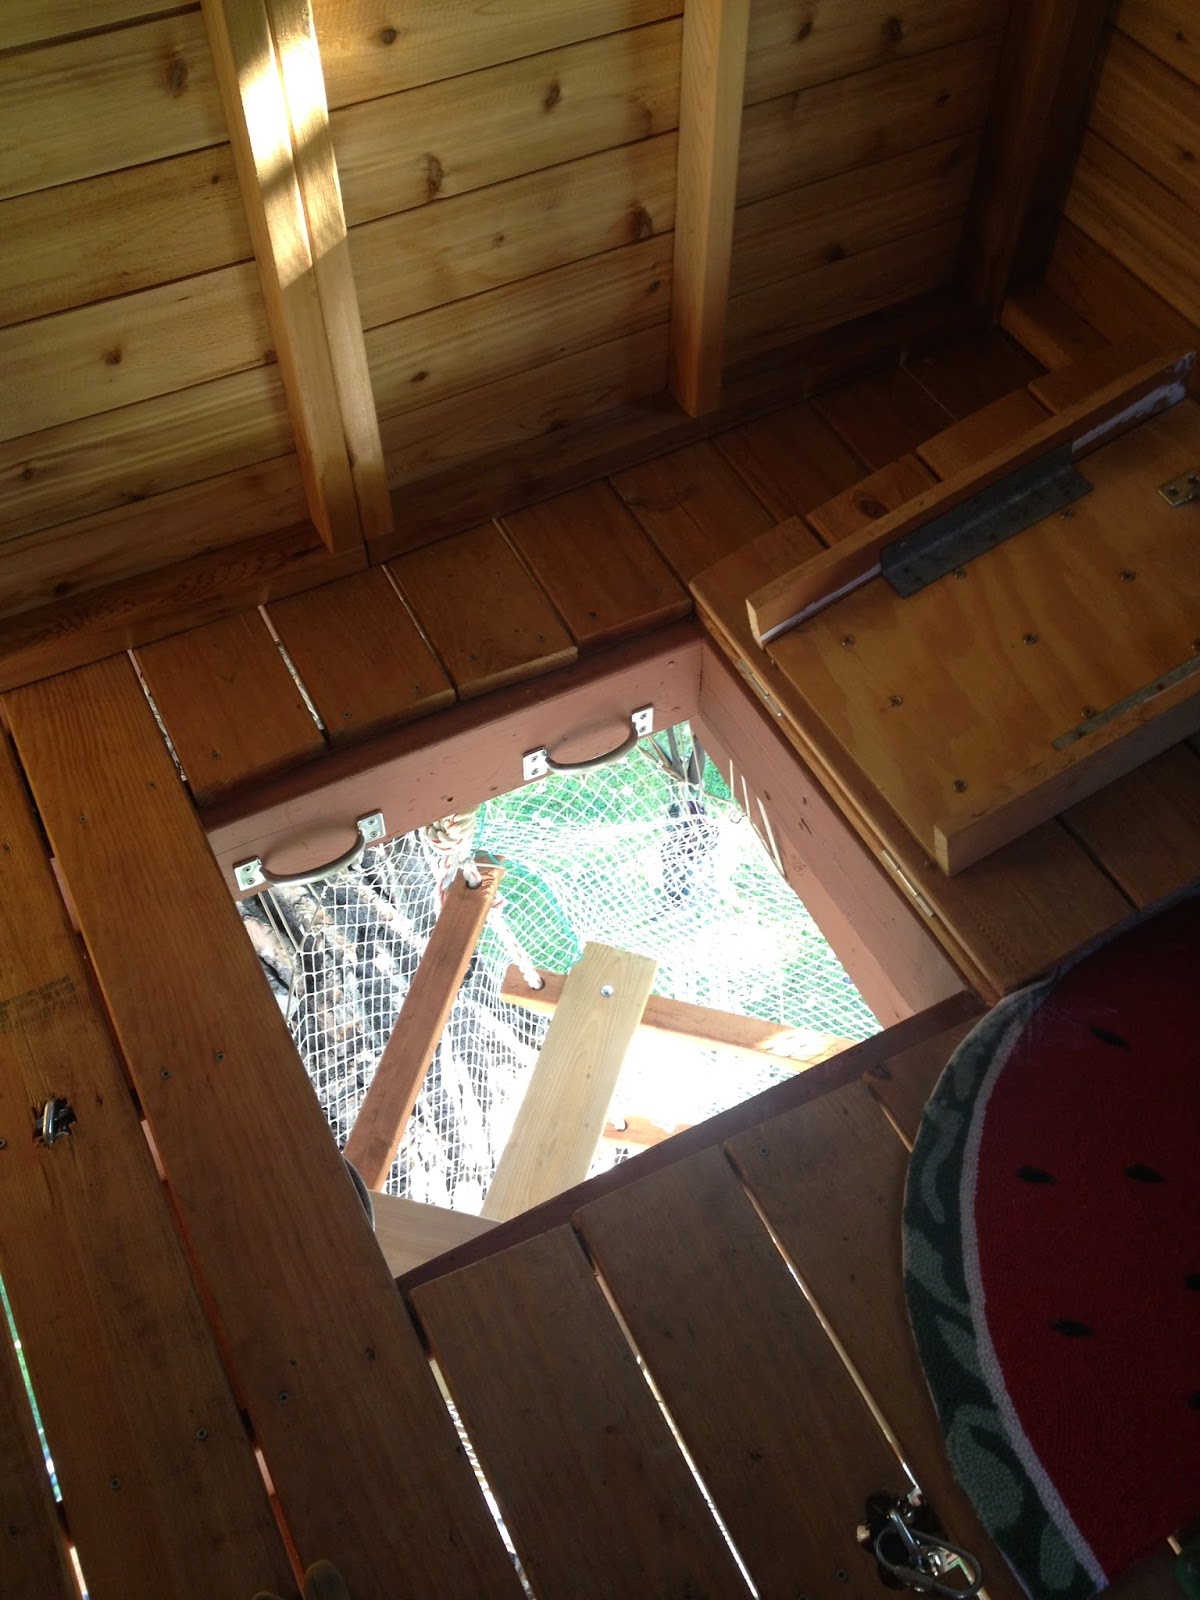
On the inside, it was a matter of squaring things up and driving a lot of screws.


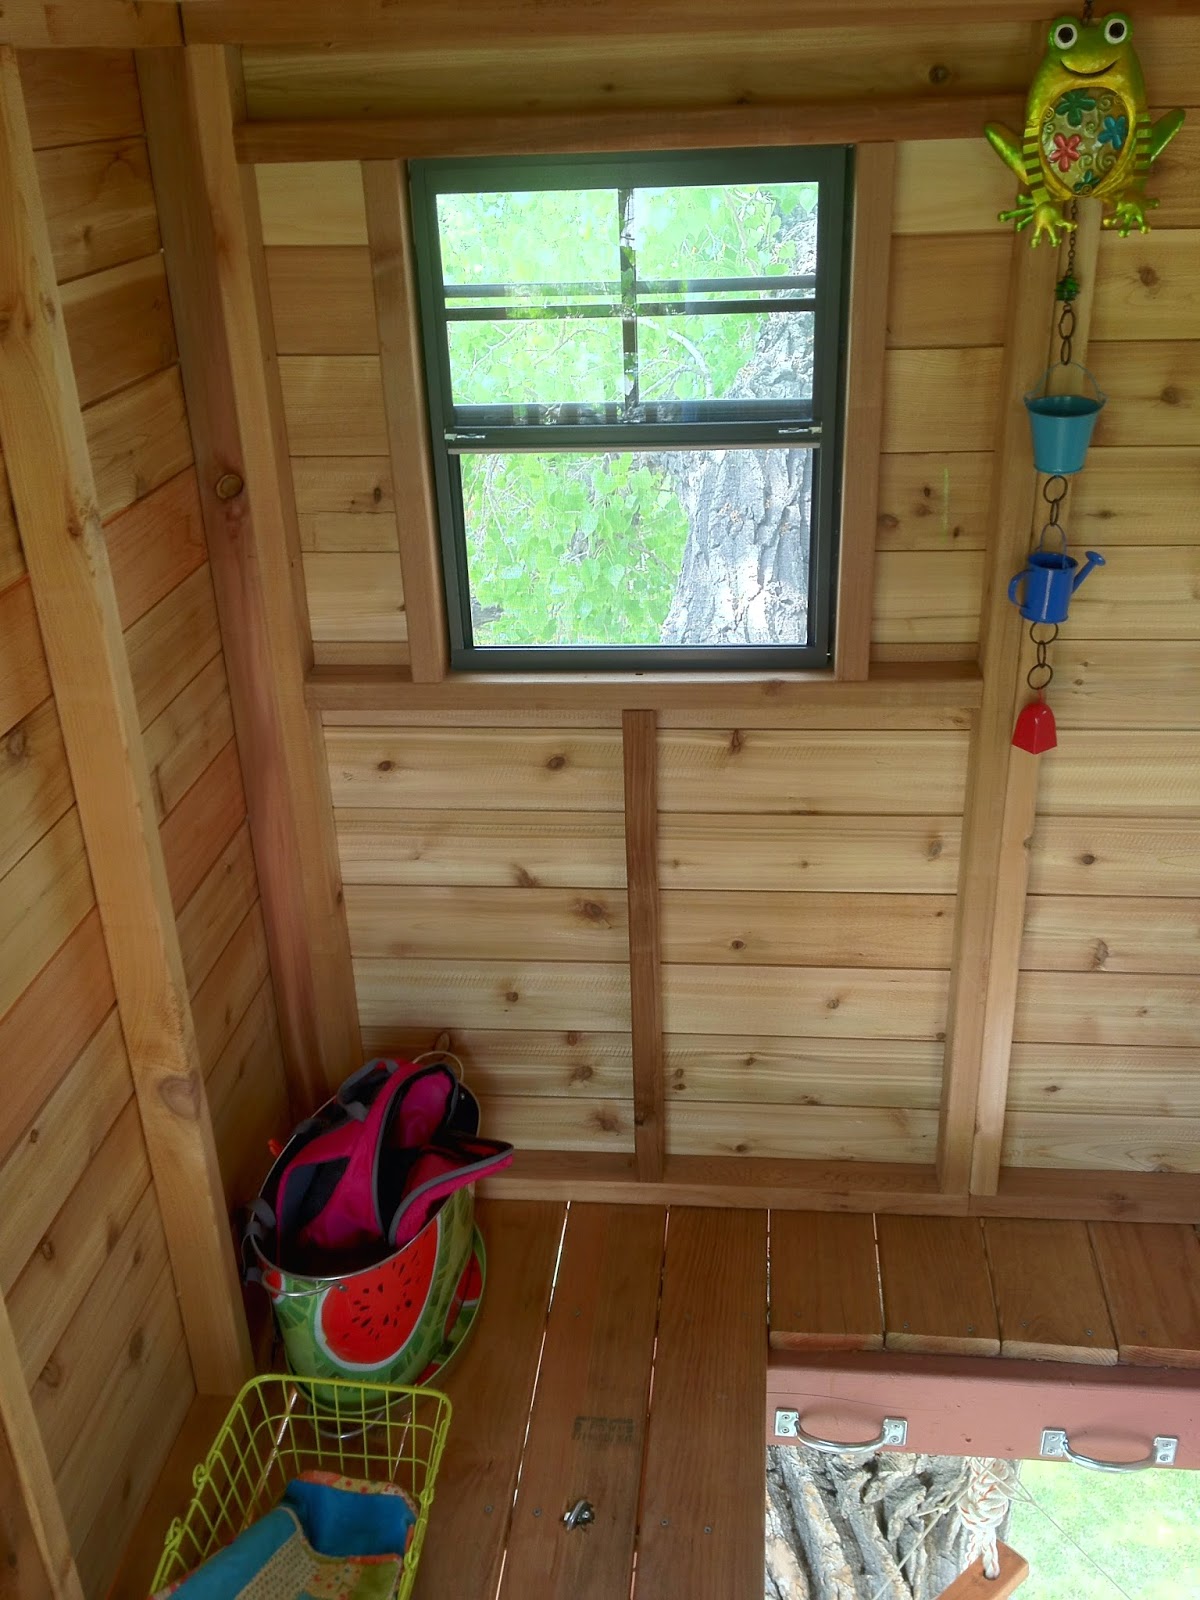
One thing about a treehouse with no roof (yet): great light.

The individual pieces of the deck railing details looked just fantastic; again the view was really something.


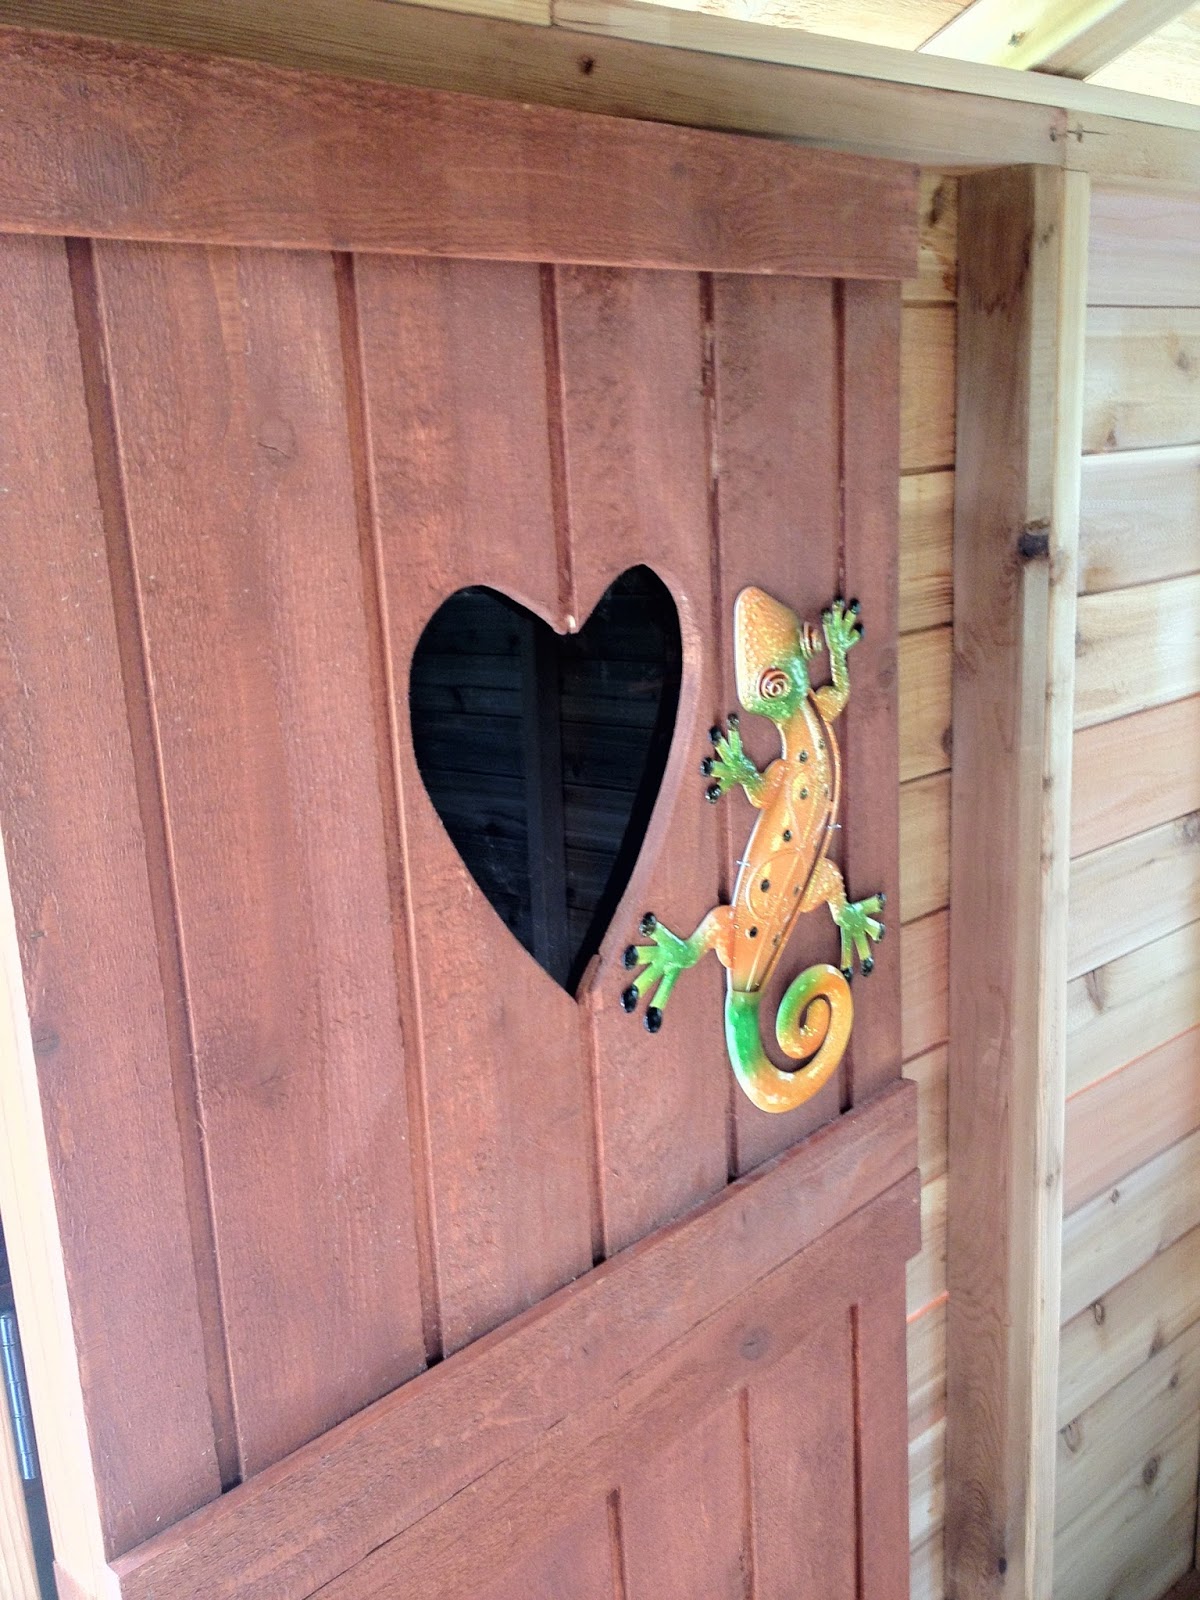
Getting the door to open and close correctly was a bit of a fiddly bit of work, but it came together. I also hauled up the roof truss assemblies and got them into place -- also fiddly.


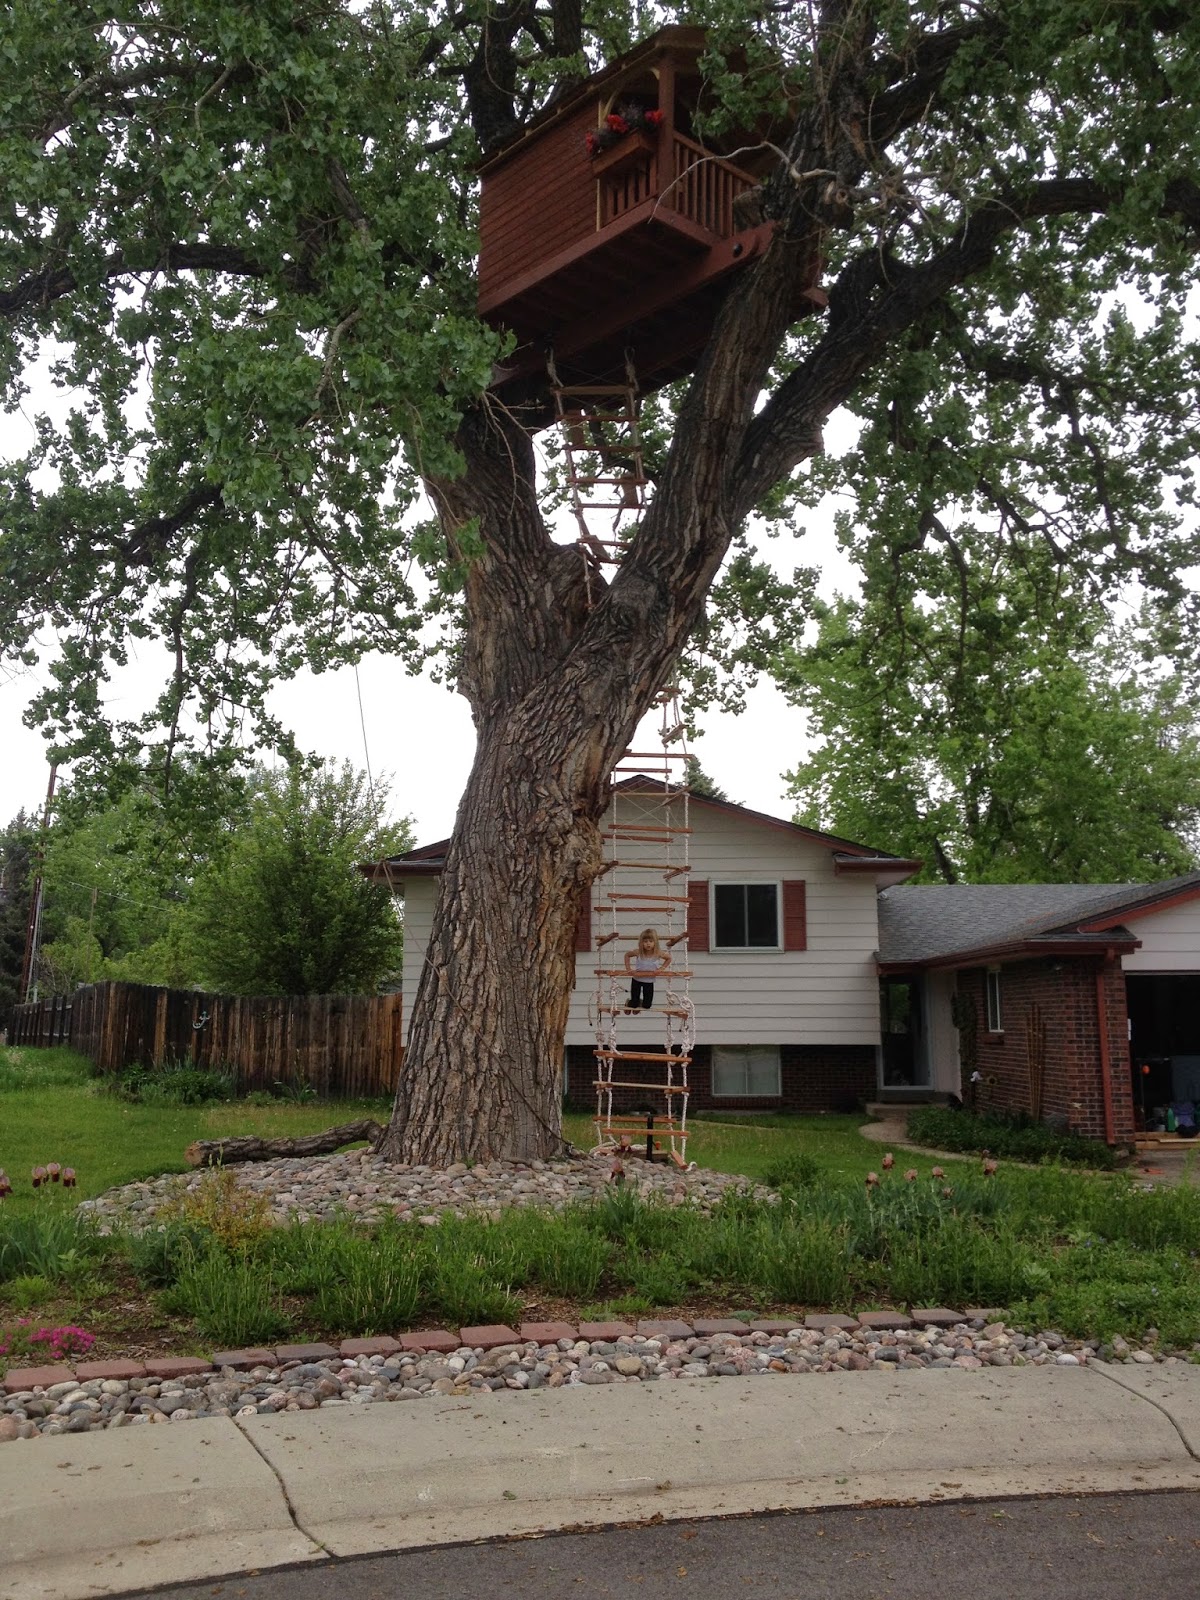
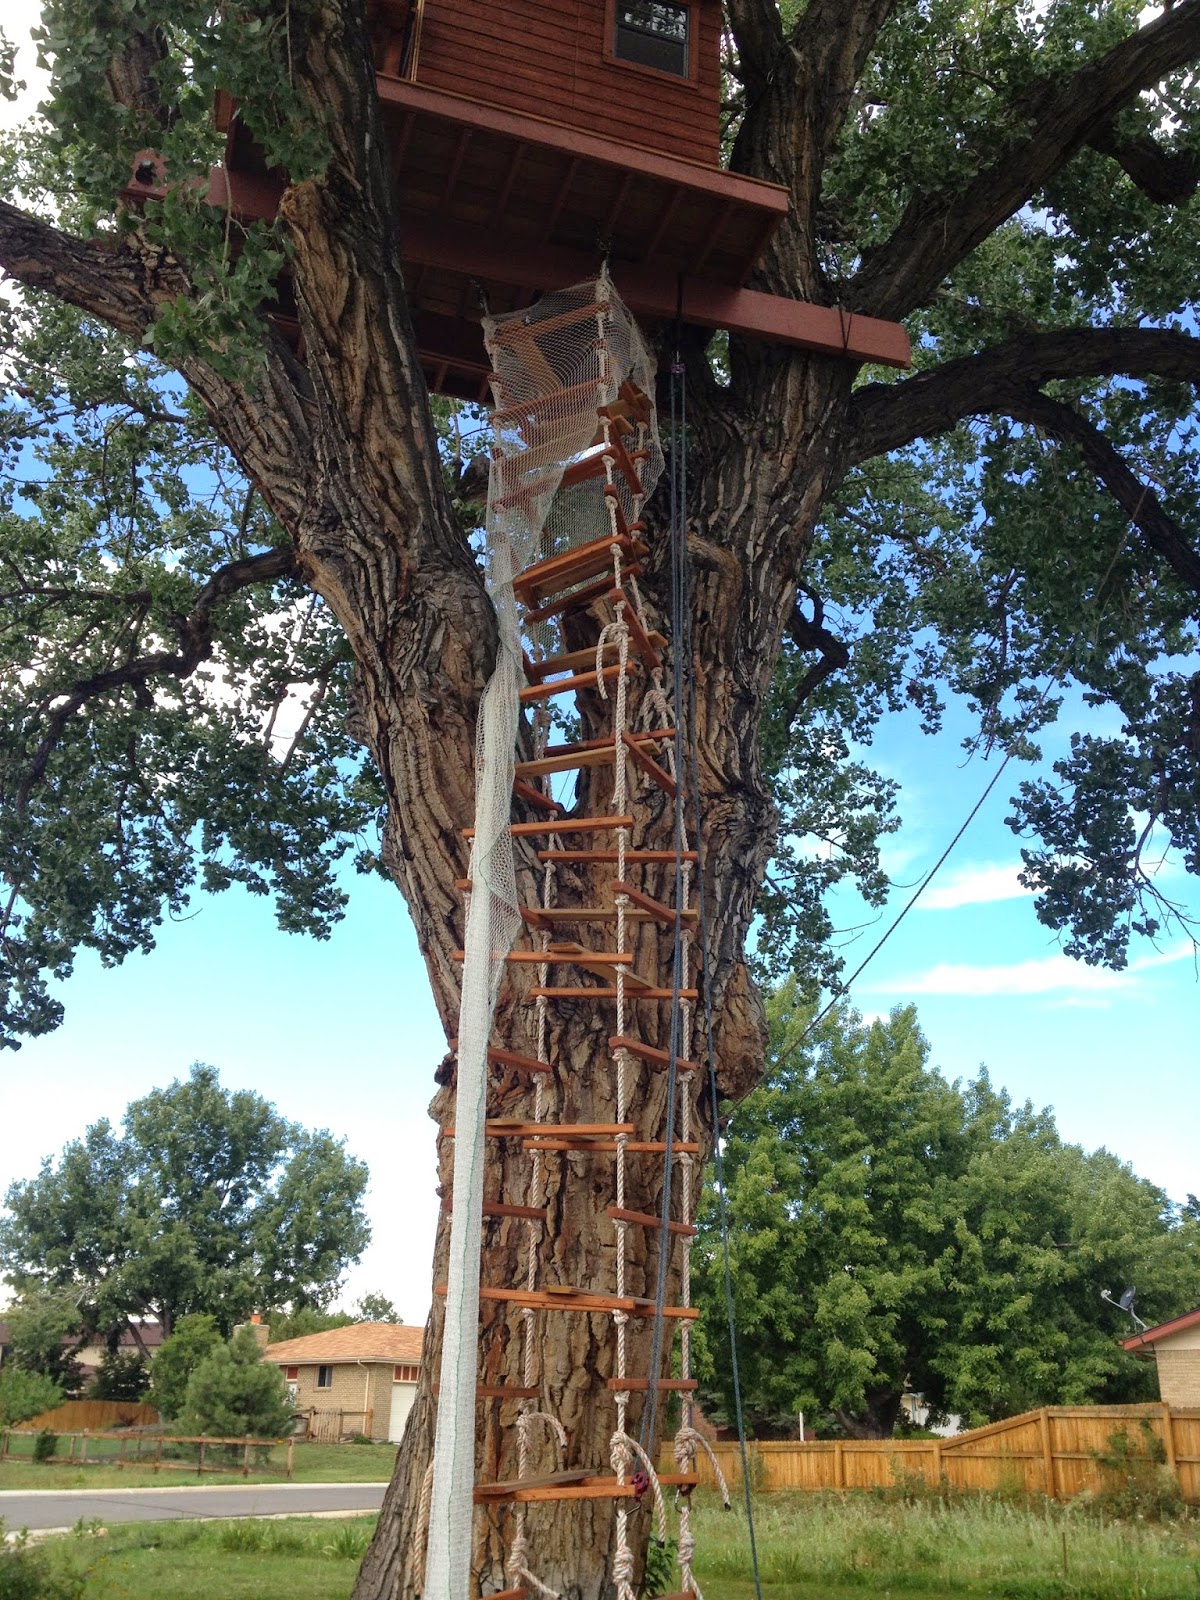
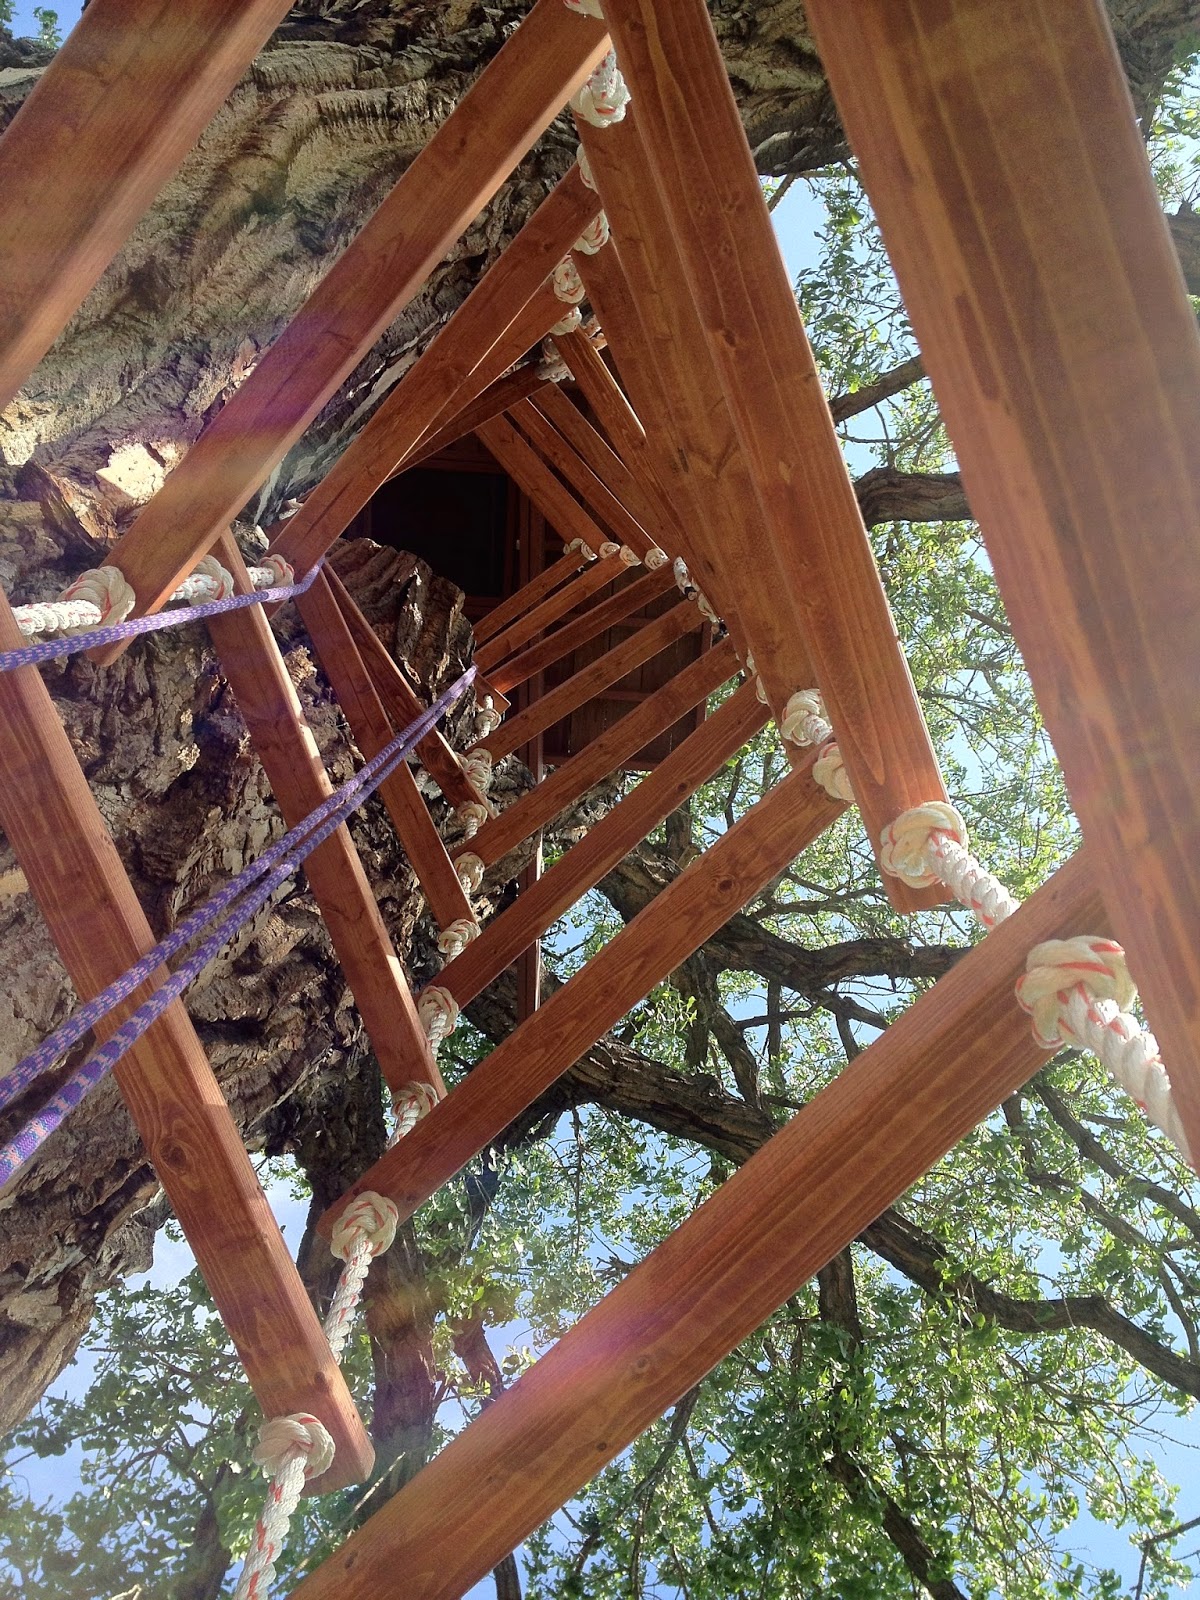
I thought it might be easier to accomplish things with the rope ladder in place, so I spent some time hauling up and securing the first section to the bottom of the treehouse.

"Some time" = half a day. Heavy and cumbersome.

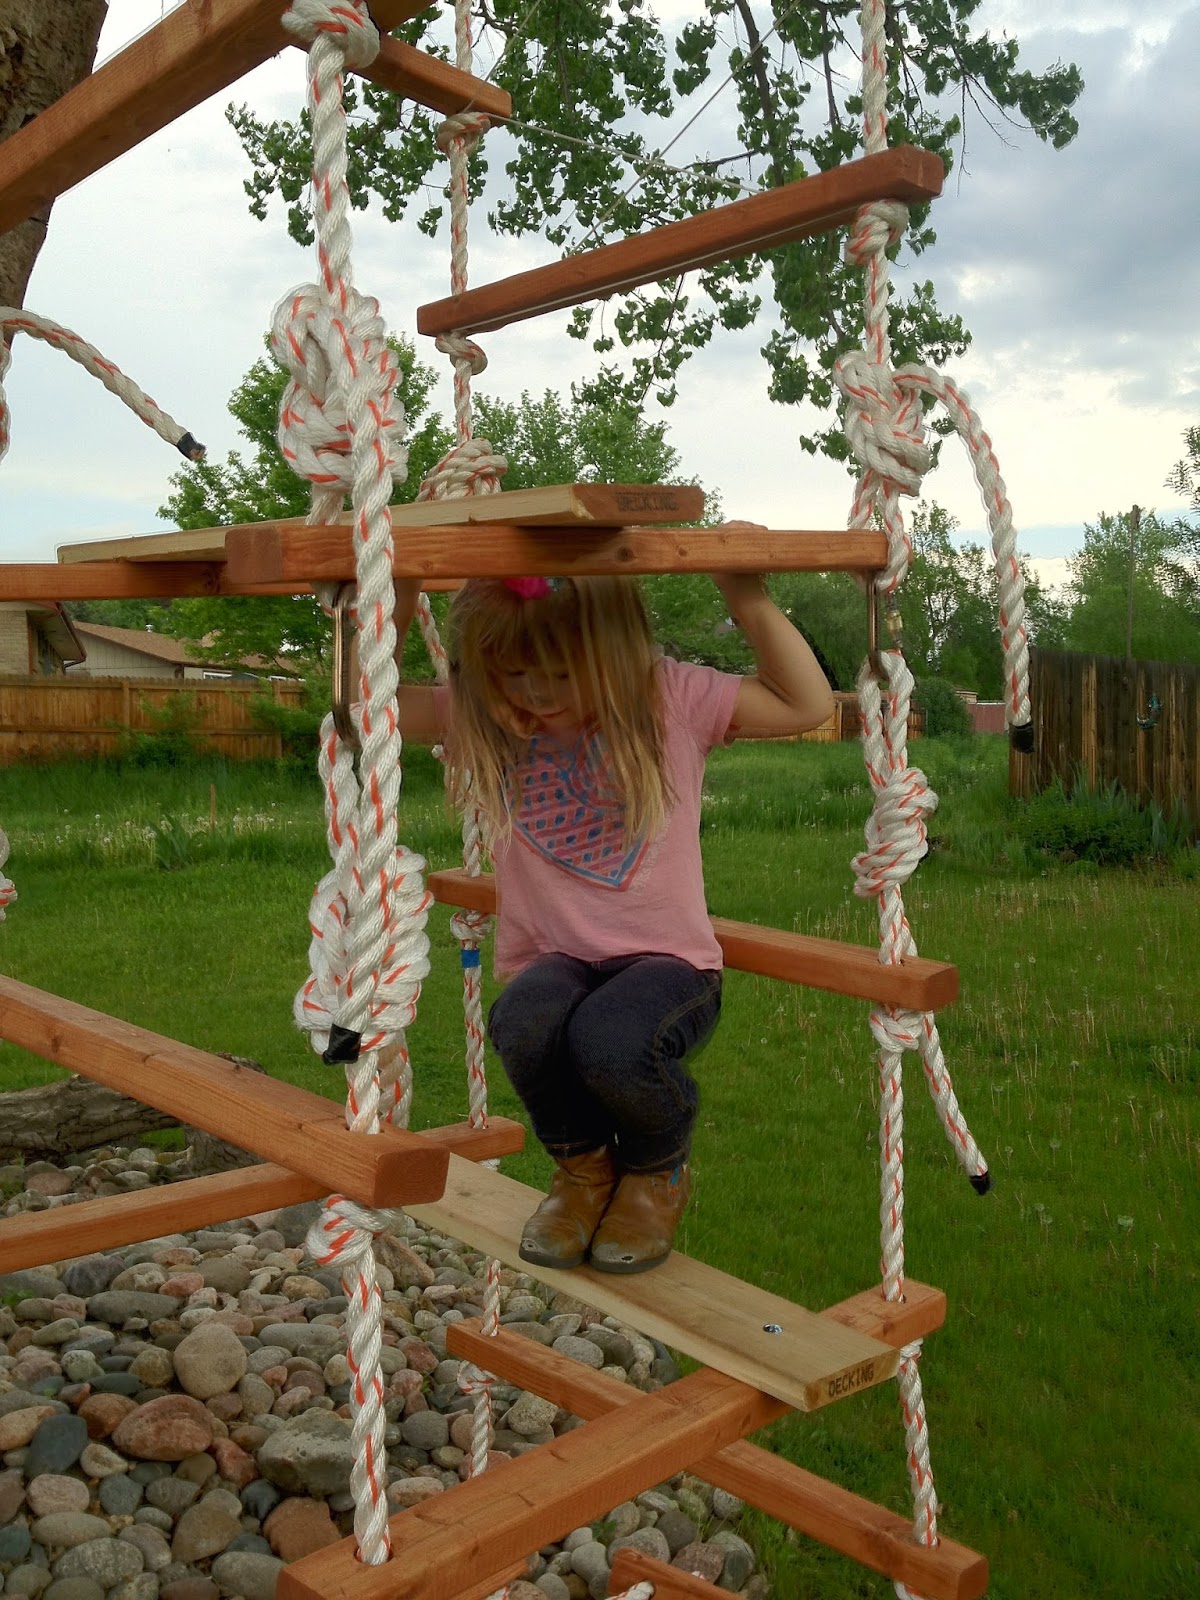
It became clear pretty quickly, however, that I wasn’t going to save any time using it while I was still going up and down with tools, panels, and random lumber. So I decided to wait on the rest of the treehouse ladder.

Here’s a good example of how I’d save a few trips up and down. You can see I have several roof panels tied on the rope, about 30 feet apart; I would get myself up there, and then haul up one section at a time without needing help from the ground.

I used this method for everything -- lumber, tools, tool bags. Whatever I needed up there for the day. Or next little bit.

The roof sections were particularly tricky, because I wasn’t able to follow the basic instructions, e.g. standing outside the house and laying them in place that way. Each roof panel had to be lifted through the roof framing sideways, then laid down flat — where I’d hold it in place with one hand and put a few screws in with the other. I also discovered the roof panels were too large to fit between the trusses, so I had to pull off a few shingles and cut them all in half, then replace the shingles once they were in place.

That meant I had to build the treehouse roof from the back, so to speak, adding panel halfs, re-nailing shingles over those cuts, nailing down a top shingle or two, and moving on.

What a great looking treehouse roof, right?

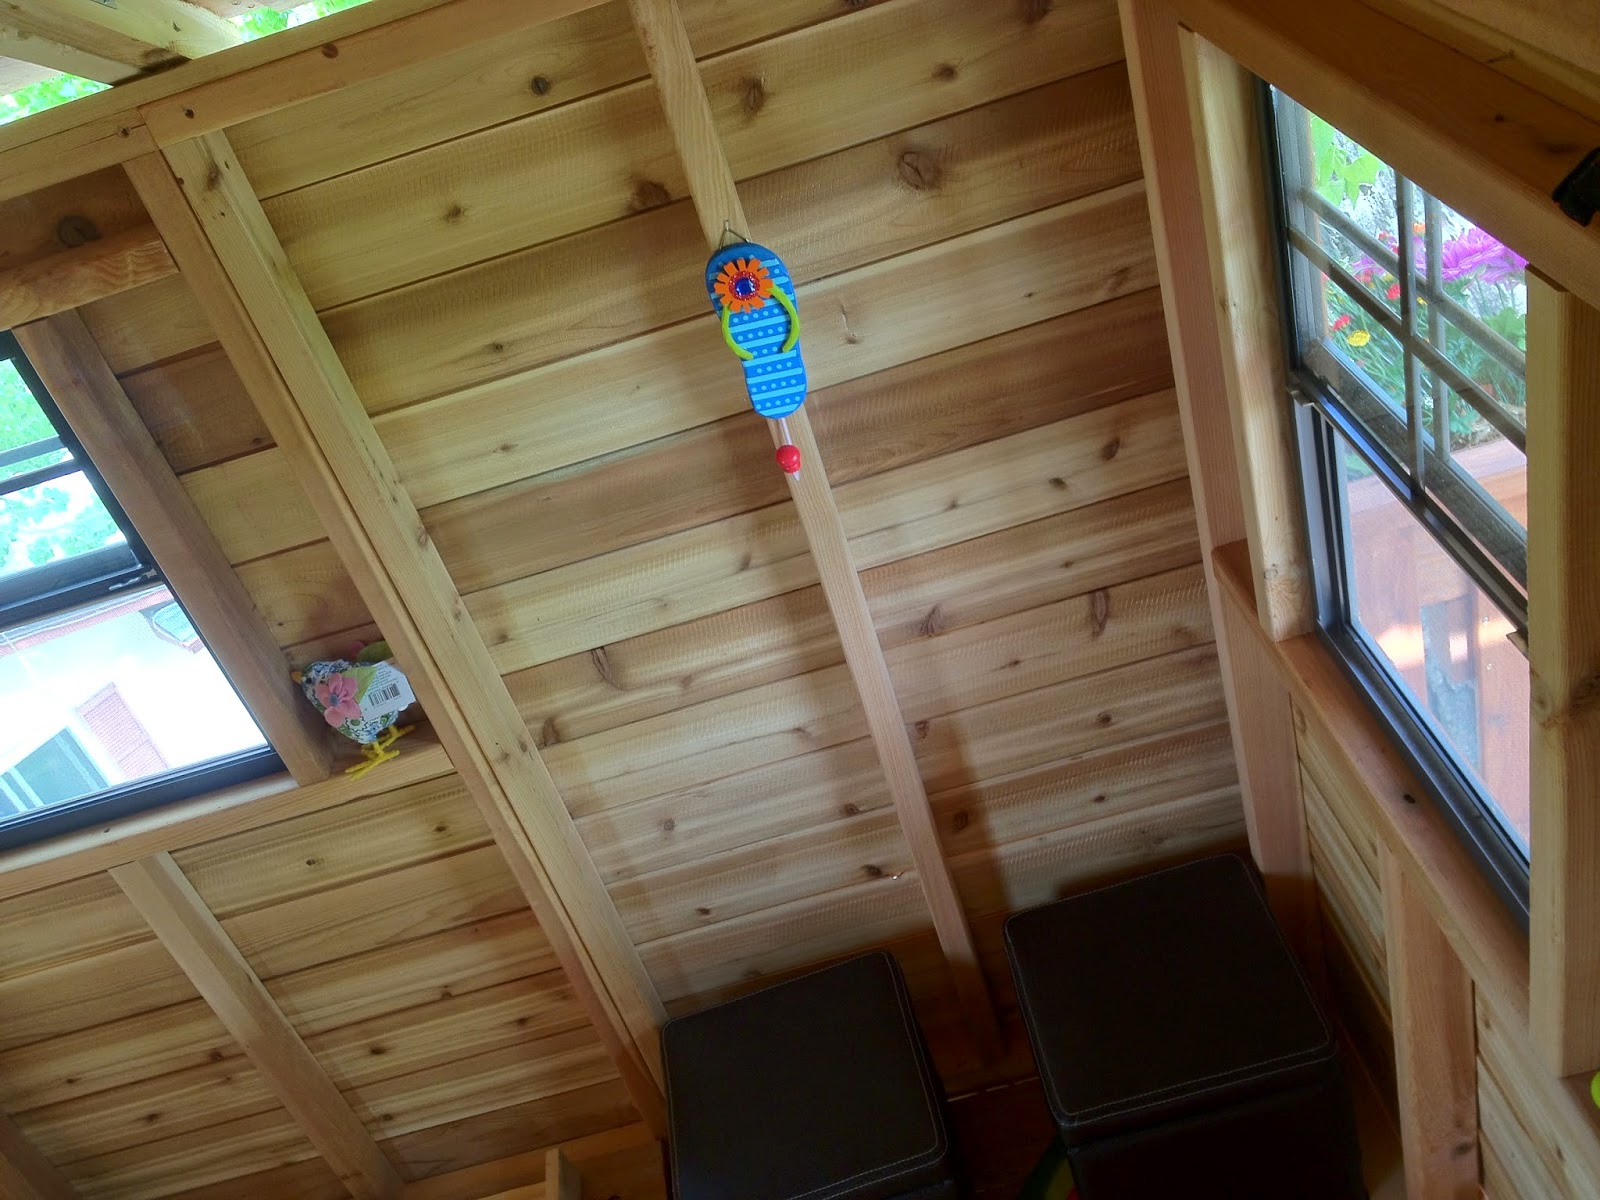
Inside you can see the extra hardware to support the extra number of roof panels.

Typical gap through which I'd have to slide a roof panel.

Eventually I got to the end and found there wasn’t any safe way to reach and place the last couple of top shingles without re-fixing a new safety anchor for myself; since the gap was over the “deck” area, I decided to let it slide for a while.

Next up I’d be hanging the treehouse rope ladder.

On to Part 16: Hanging the Treehouse Rope Ladder

Wednesday, January 21, 2015

Part 14: Decking the Treehouse Platform

Hauling up a bunch of lumber for the treehouse floor

It was starting to look pretty neat, both from the ground and from the treehouse platform frame.

And from my second-story bedroom window, through the screen.

The next big order of business was securing the floor framing to the main treehouse beams. I decided to use the cordless palm nailer and put as many hurricane ties in as I could, on both sides of the beams. I wasn’t really worried about it tipping off, but better safe than sorry — and if you’re going to do things, overdo things.

Lots of nails.

Next, I planted myself in a half-decent spot in the tree and hauled up deck boards, one at a time. Instead of the cord I'd used raising the treehouse beams, I used climbing rope. My wife would run a lasso strap around each board, I’d lower the rope, repeat until they were all stacked on the frame. I also brought up the big 4x4 posts (and their carriage bolts), and the jigsaw — since I’d be cutting the deck boards to fit around the 4x4 posts.

A careful eye might also see the chains for the rope ladder behind me. Those needed to be in before decking as well.

Each post had two carriage bolts , one atop the other, that secured the post right to the floor frame -- and in a corner, so the thing would be rock solid. After bolting the posts in place, it was a matter of screwing down the deck boards with a par of 2-1/2" deck screws at every joist, and cutting one or two of those boards to fit snugly around the 4x4 posts (and cutting a few for the trap door opening as well).


It was one heck of a cool looking deck.

And high, too. You can see how I notched the deck boards for the rope ladder chains. 

This treehouse was going to have a great view.

Using the method we’d pioneered with the deck boards, my wife helped me haul up all the panel pieces for the treehouse itself, which I stacked neatly on the deck. Since it looked like it might rain, I also put a big black tarp over everything, just to keep it dry for the next day’s work.

I woke up to this.

Well OK then.

So I took a day or two off; the treehouse would have to wait until the snow melted.

On to Part 15: The Treehouse Takes Shape

Tuesday, January 20, 2015

Part 13: Raising The Treehouse Platform

Lifting a platform for a treehouse into a tree

Spring was pretty much going to start any minute; the weather was cooperating. I was out of excuses — it was time to get moving on the treehouse project again.

I’d decided for the small cost and effort involved, it would be worth it to get another pair of long 2x12 beams up into the tree, effectively doubling the strength and stiffness. On one side, it would just be a matter of slipping the second beam into the wire sling and adjusting the turnbuckle I'd put in when installing the treehouse bolts.

I wound up taking apart and putting back together the turnbuckle to do it, but well worth it.

For the other side, I cut a circular hole just big enough (and offset enough) to get over the treehouse bolt and square metal washer.

While I had the jigsaw out, I made a circular edge for the outer 2x12s, too. Just because it looked kind of neat.

I got up there and drove some nails to join the 2x12s together.

Using the cordless palm nailer.

Now I had a serious surface to get the floor up and onto.

Note the plastic lawn chair. I'd become interesting enough to watch.

I ran a bunch of pulleys, and my wife and I carried the floor framing out to the tree.

Serious business. It was kind of heavy.

My idea was I’d attach my lifting lines to one side of the floor — the bottom, as it lays sideways — and have another loose line on the other (top) side. My lifting points in the tree were attached to the treehouse beams; I figured we could lift the thing right up and past a balancing point where it would just flop down into place.

There are no pictures of the process, but it was a bit more difficult than that. The floor frame kept threatening to tip right over and back down onto my wife, who was struggling with the weight involved, mechanical advantage notwithstanding. On at least three separate occasions, I was quite certain I was going to lose the floor frame — and only every ounce of strength kept it from falling to the ground.

It was, put simply, a very near thing. But.


There's that "little" branch, a perfect fit. Better to be lucky than good.

We’d done it. And it looked just like I’d imagined. I ran a few obligatory safety straps around things (it wasn’t going anywhere) and came down for the day. It was starting to look a lot like we might be building a treehouse!

On to Part 14: Decking the Treehouse Platform